Merge fields in the WYSIWYG editor
You can add merge fields, conditionals, and looping fields in the WYSIWYG editor.
A merge field is a variable in your message or template that you want to populate with a personalized value for each member of the audience. Merge fields use Handlebars syntax — {{merge_field}}. When you create a merge field, you set its Field Logic, which determines both how you use the field and the options you have when you use the field in a message:
None — Applies to Text content elements. When you send a message, Airship replaces your merge field with the appropriate value. This is considered a standard merge field.
Conditional — Applies to rows of content in your message. When you send a message, Airship evaluates the condition and determines whether or not to insert a row of content, depending on if the Key Path is populated (true) or not (false).
Loop — Applies to rows of content in your message. When you send a message, Airship evaluates the condition and determines whether or not to repeat a row of content for each item in an array, or display the content, depending on whether or not an array is populated. Not supported for In-App AutomationMessages cached on users’ devices and displayed when users meet certain conditions within your app, such as viewing a particular screen or opening the app a certain number of times..
Merge fields, conditionals, and looping fields make it easier to take advantage of Dynamic ContentVariable message content created using Handlebars syntax. The content is populated at send time, resulting in personalized messaging for each member of your audience.. Merge fields are not supported for Email Preference CentersA page where users can manage their opt-in statuses for the Subscription Lists in your project. Preference Centers are presented within your app or website or as an Airship-hosted web page..
You can also take advantage of looping (#each), conditional (#if), and other advanced HandlebarsHandlebars is Airship’s templating language for personalization. Handlebars expressions use double curly braces wrapped around a content template, ranging from a simple variable, e.g., {{first_name}}, to complex evaluations of personalization data. within HTML content to show or repeat text. However, you cannot apply conditional or looping logic to block-level elements in your layout without adding merge fields to your layout.
Creating and editing merge fields
In the WYSIWYG editor:

Click Merge fields.
Click Create field to add a new field or to edit an existing field.
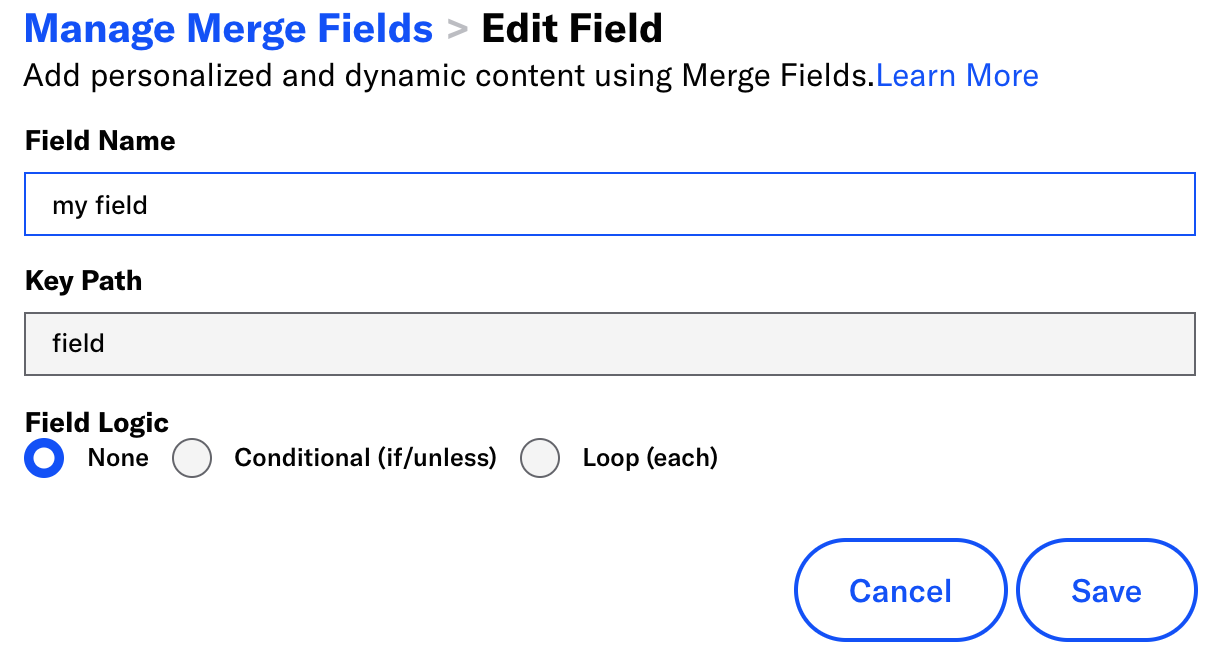
Enter a Field Name. This is the friendly name for this merge field that you’ll see in the editor.
Enter the Key Path. This is the path to the variable that you want to use.
- For AttributesMetadata used for audience segmentation and personalization. They extend the concept of Tags by adding comparison operators and values to determine whether or not to target a user, helping you better evaluate your audience., use the attribute name.
- For Custom EventEvents that indicate that a user performed a predefined action, such as adding an item to a shopping cart, viewing a screen, or clicking an Unsubscribe button. Custom Events can trigger automation, including Sequences and Scenes. You can code them into your app or website, or send them to Airship from an external source using the Custom Event API. Custom Events contain properties that you can use to personalize messages. properties, use JSON notation for the property in the event’s
propertiesobject that you want to use. For example, if you wanted to accessproperties.namefrom your custom event, you would entername. - For an Inline ListAn ad-hoc, CSV-formatted list of email, SMS, app, web, or open channel addresses that you want to register and send a message to. Unlike static lists or segments, you upload this list when creating your message. Airship registers new addresses in the list as channels when you send the message., use the column name for your variable.
Select the merge Field Logic.
Click Save.
When you’re done creating merge fields, click Done to return to the WYSIWYG editor.
Using merge fields
The way you use a merge field depends on its logic: None, Conditional, or Loop.

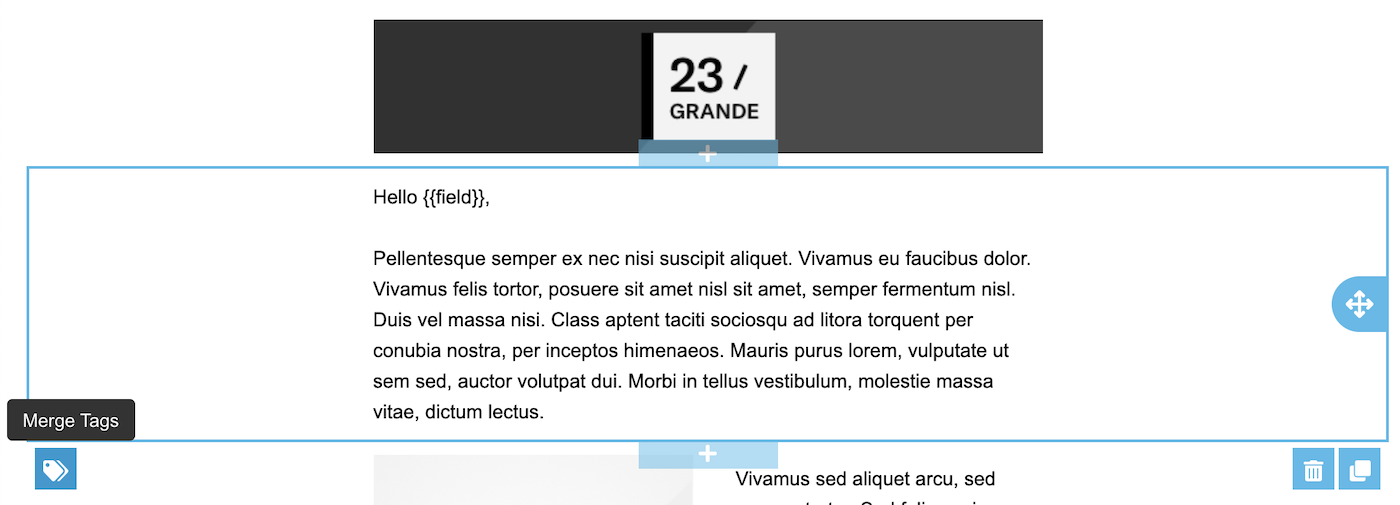
You can insert merge fields with Field Logic set to None into any Text content element in the WYSIWYG editor. Airship adds your merge field with the correct syntax in your text.
Select the Text content element that you want to add a merge field to, and a toolbar will appear.
Click Merge Tags from the toolbar, and select a merge field.
Merge fields with Field Logic set to Conditional and Loop apply to a row. You use the merge field to determine whether you want to show, hide, or repeat the entire Text content element.
While conditions apply at the row level, you can still use merge fields within your conditional block. If you want to use a field both as a block-level condition and as a value within a block, you should save two merge fields: one to represent the conditional usage of the field, and one with Field Logic set to None.
When you apply a looping merge field to a content block, you can reference the current instance of the loop with the this context. For example, if looping through an array of products in your audience’s shopping cart, you might reference the price for each product in the loop with {{this.price}}.
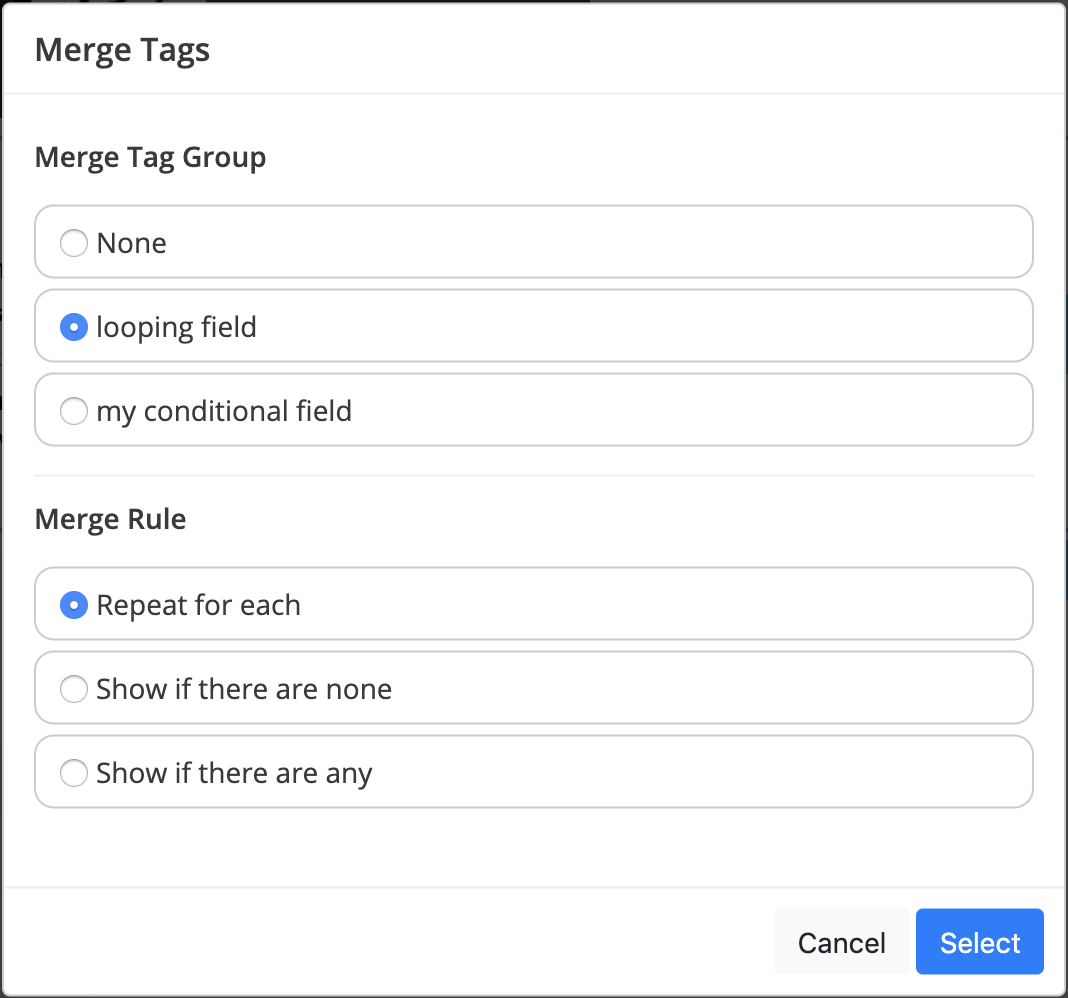
Select the row you want to apply conditional or looping logic to and click .


Using a merge field with Looping logic Select the merge field that you want to apply, then select from the available options.
For conditional merge fields:
- Show if condition is false — Displays the block if the field does not exist, is empty, or is
null. - Show if condition is true — Displays the block if the field exists and is not an empty string or
nullvalue.
For looping merge fields:
- Repeat for each — Repeats the block for each item in an array.
- Show if there are none — Displays the block if the key path is empty or does not exist.
- Show if there are any — Displays the block if the key path exists and has at least one item in the array.
- Show if condition is false — Displays the block if the field does not exist, is empty, or is
Click Select.
Categories
