Link to Your App From the Back of an Apple Wallet Pass
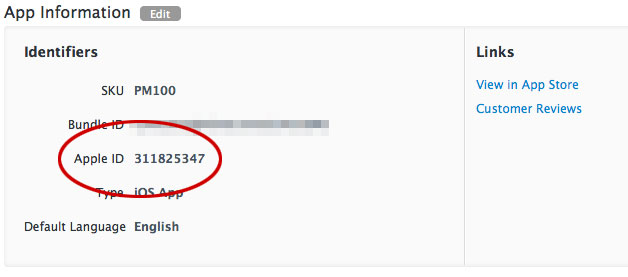
If you have an iOS app that works with your pass, you can add a link to the app from the back of a pass by creating an association between the app and the project by entering the app’s iTunes Store Identifier (ADAM ID).
- If the app isn’t installed on the device, the link opens the app’s page in the App Store.
- If the app is already installed, the link opens the app.
Enable the Wallet Service
Make sure you perform these steps using the same Apple Developer account that is associated with your app’s Apple Pass Type Certificate.
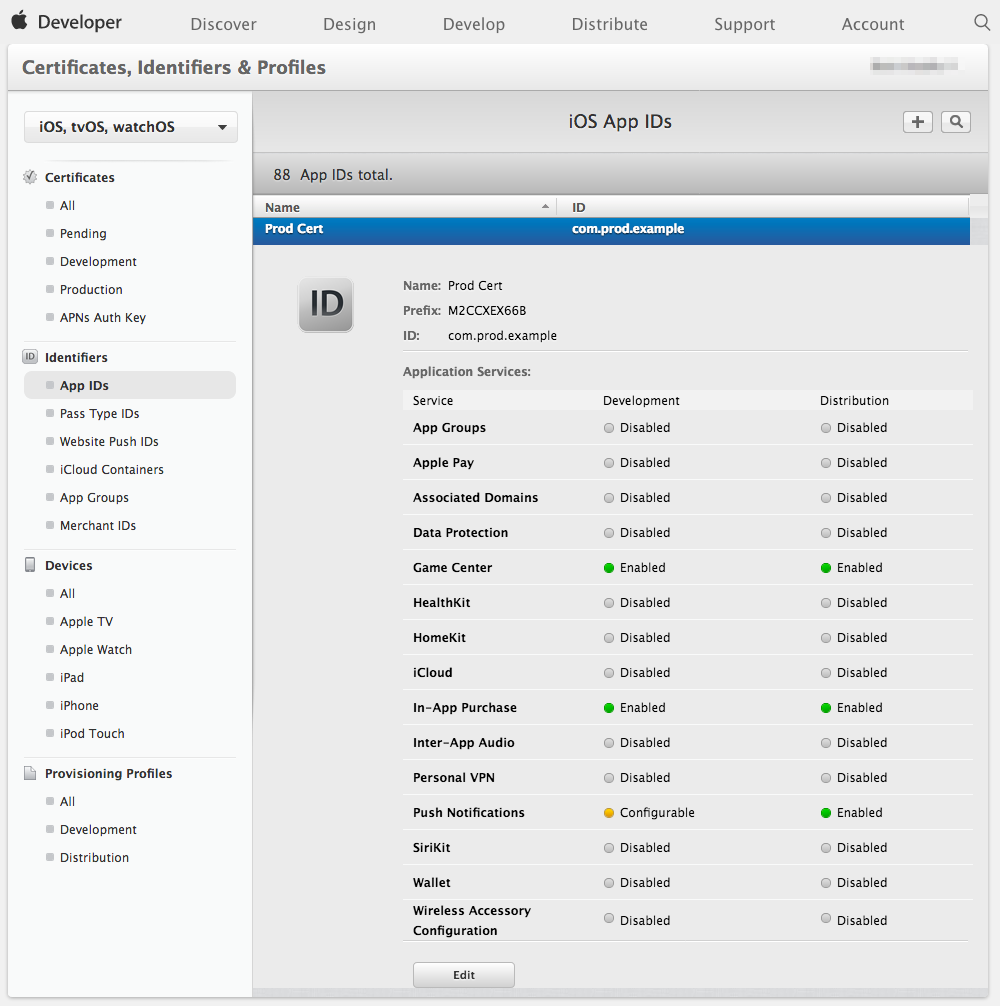
- Log in to your Apple Developer account , then go to Certificates, Identifiers & Profiles » App IDs.
- Click the row of app you want to edit. You should then
see a list of services associated with the app.

- Click Edit, check the box for Wallet, and click OK to confirm.

Although this change may take a few hours to propagate throughout Apple’s system, you do not need to resubmit your app for approval. You can now add the ADAM ID to your project.
Add an ADAM ID to Your Project
- Go to Settings » Associated App ID.
- Click Configure ADAM ID and enter the ADAM ID.
- (Optional) Click +Add An ADAM ID to add more IDs. They will be listed as ADAM
ID 1, ADAM ID 2, etc.
Note - Only add multiple ADAM IDs if you have another app to associate with the pass.
- Enter multiple ADAM IDs in order of priority. Airship uses the first ADAM ID in the list that is compatible with the user’s device.
- Click Save.
Delete an ADAM ID
- Go to Settings » Associated App ID.
- Click Configure ADAM ID.
- Click the X at the end of a row.
- Click Save.
Feedback
Was this page helpful?
Thank you
Thanks for your feedback!
Tell Us MoreThank you
We will try harder!
Tell Us MoreCategories

