Dashboard tools for Handlebars
Built-in tools that simplify entering Handlebars expressions.
{{first_name}}, to complex evaluations of personalization data.
We provide tools in the dashboard that simplify adding and formatting merge fields and logic statements that conditionally render content.
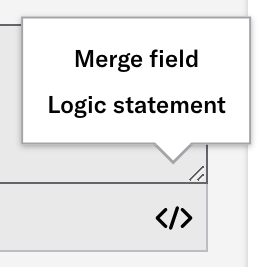
When entering content in text fields, click </> to start creating merge fields or logic statements for the Text and Number AttributesMetadata used for audience segmentation and personalization. They extend the concept of Tags by adding comparison operators and values to determine whether or not to target a user, helping you better evaluate your audience. in your project.
These options are available for most text fields, such as message body, button labels, URLs, Custom KeysAdditional key-value pairs in your push notification payload for use by custom code in your app or website. You can use custom keys to pass additional campaign identifiers for analytics, pass user information to the device, control the look and feel of the app, provide image links, etc., and pasted or uploaded HTML in the Interactive editor.
See also: Handlebars reference.
Merge fields tool
A merge field is a variable in your message or template that you want to populate with a personalized value for each member of the audience. Merge fields are the most basic Handlebars expression.
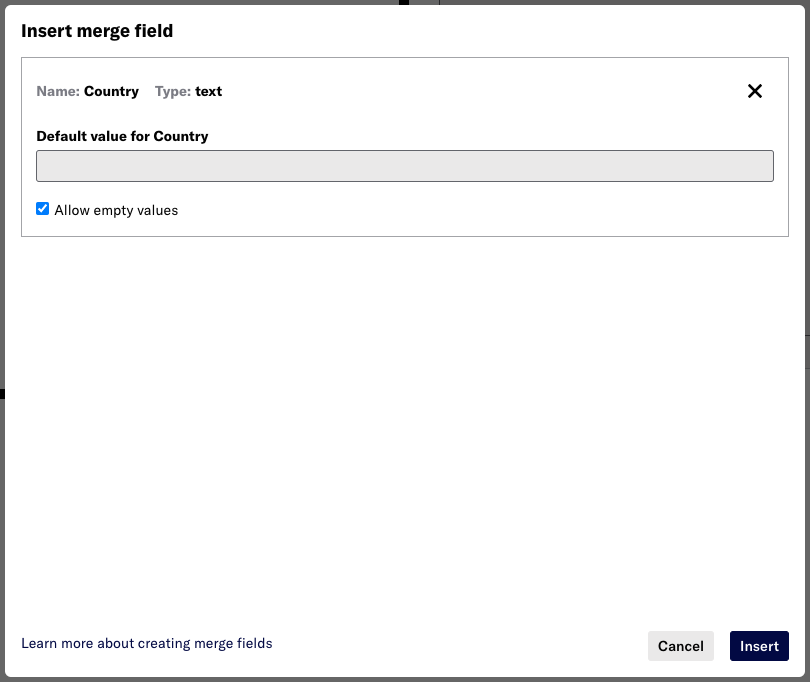
Using this tool, your expression is inserted in the text field in the format {{attribute_id}} or {{$def attribute_id "default_value"}}.

When entering content in text fields:
- Click </> and select Merge field.
- Search for an attribute and select from the list. You can search by attribute name or ID.
- Do one of the following:
- Enter a default value that will be used if the merge field is empty.
- Leave the default value blank and check Allow empty values.
- Click Insert.
After inserting, you can edit the "default_value" or delete the entire handlebars string to remove it.
Logic statements tool
Logic statements include conditional requirements. The first statement you add is an if, which means your content is rendered in your message if the statement is true. You can then add else if and else statements. Each additional statement is a condition that builds on the preceding one, and all are formatted as a single expression.
Statement 1:
if— The specified text is displayed if the statement is true. Only this initial statement is required.Statement 2:
else if— The specified text is displayed if statement 1 is false and statement 2 is true. You can add multipleelse ifstatements.Statement 3:
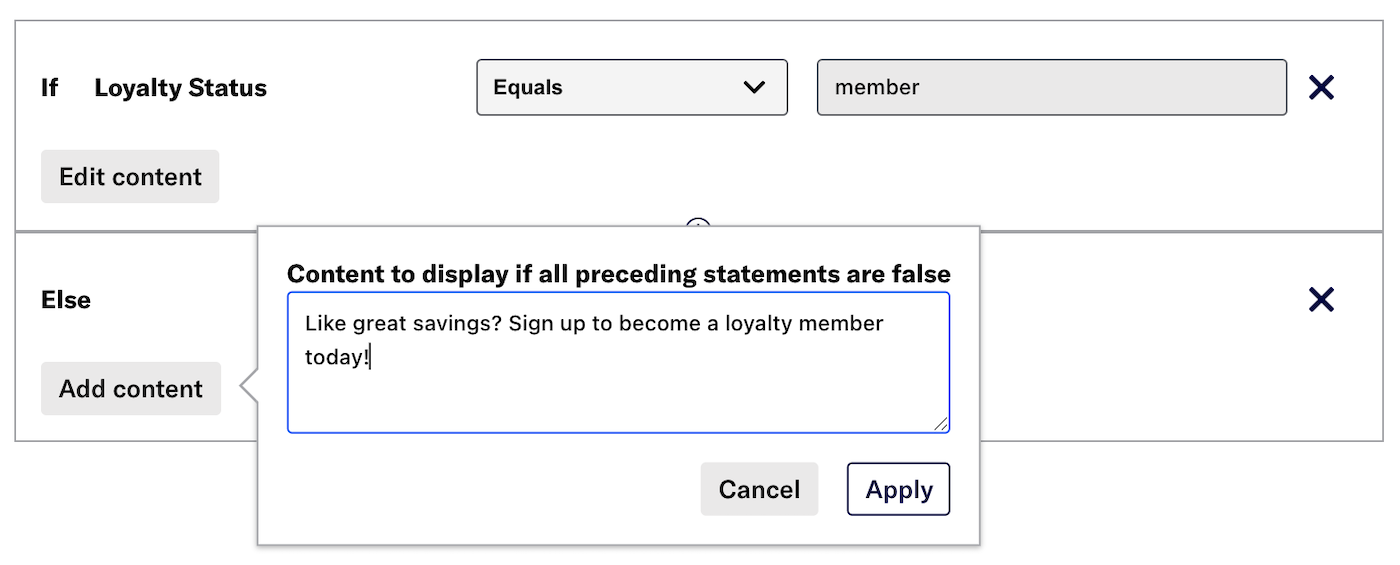
else— The specified text is displayed if all preceding statements are false. You can add anelsestatement without adding anyelse ifstatements.
See also: Handlebars Reference: If/Else Statements.

When entering content in text fields:
- Click </> and select Logic statement.
- Search for an attribute and select from the list. You can search by attribute name or ID.
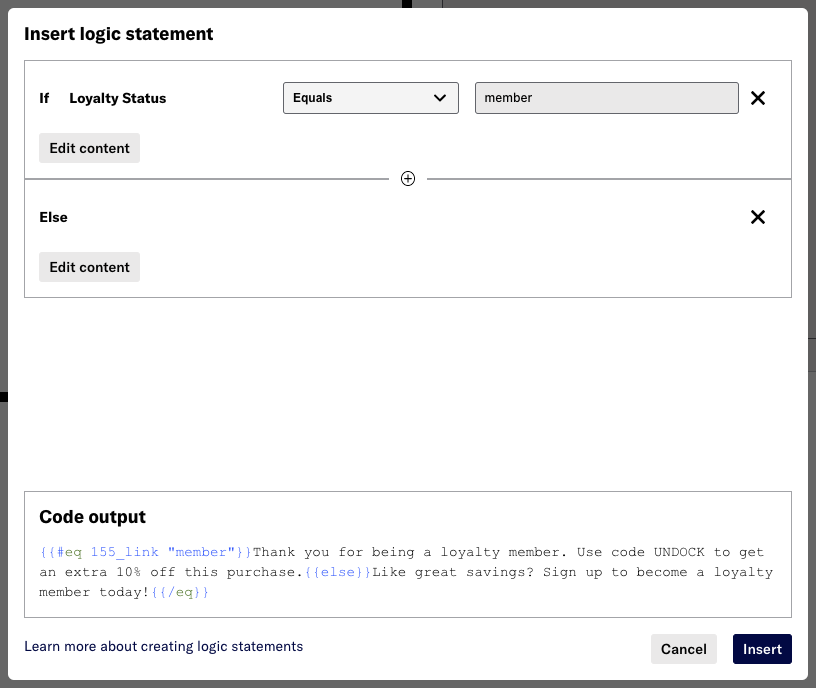
- Select the operator you want to use, and enter a value. Available operators depend on the attribute type (Text or Number). As you add and edit statements, the code output that will be inserted in your message displays at the bottom of the window.
- Click Add content, enter the content you want to display in the message when the statement is true, then click Apply.
- (Optional) Click to add
elseand/orelse ifconditions and complete previous steps. - Click Insert.
After inserting, you can edit the display text for each statement or delete the entire handlebars string to remove it.
Example logic statement
In this example, we want to show existing loyalty program members a discount code and non-members a signup message. We will build this expression based on attribute loyalty_status.

First set the attribute to equal value member.

Then enter content Thank you for being a loyalty member. Use code UNDOCK to get an extra 10% off this purchase..

Next add an else statement, for users for whom the first statement is false, and enter the content those users will see instead: Like great savings? Sign up to become a loyalty member today!.

The code updates as you add and edit statements. Click Insert to add the expression to your message.
Categories
