Custom Notification Buttons
Create buttons that are available to other users in your project, ensuring that your buttons are uniform across notifications and Airship reports.
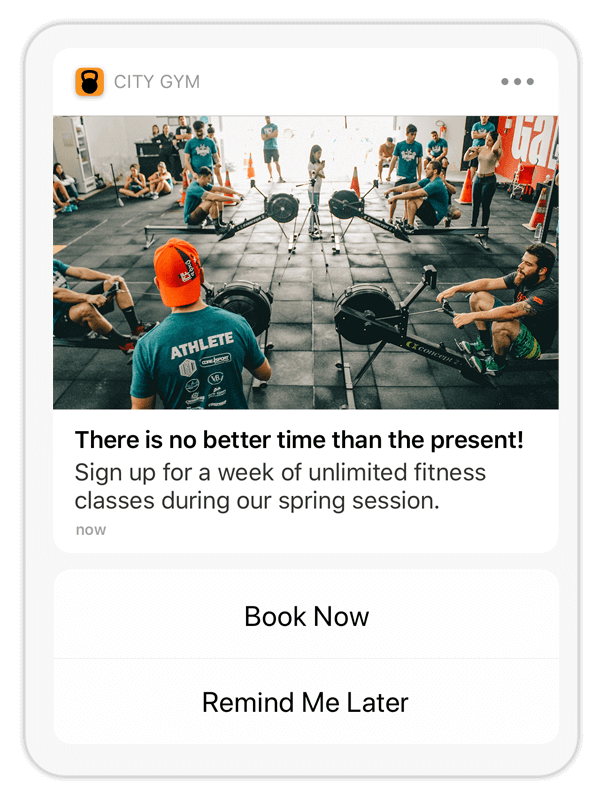
You can add buttons to push notifications and in-app messages to direct users to take specific actions. One or two buttons are supported, e.g., a single Watch Now button, or a Yes/No pair, and you associate each button with an ActionA configurable behavior that occurs when a user interacts with your message, e.g., opening a web page.. You can also add or remove TagsMetadata that you can associate with channels or named users for audience segmentation. Generally, they are descriptive terms indicating user preferences or other categorizations, e.g., wine_enthusiast or weather_alerts_los_angeles. Tags are case-sensitive. or opt a user in to or out of a Subscription ListAn audience list of users who are opted in to messaging about a specific topic. Users can manage their opt-in status per list using a Preference Center. when they tap a button.
Airship records button clicks to help you track how your audience engages with your messages. Airship records them as Custom EventsEvents that indicate that a user performed a predefined action, such as adding an item to a shopping cart, viewing a screen, or clicking an Unsubscribe button. Custom events can trigger automation, including Sequences, Scenes, and Surveys. You can code them into your app or website, or send them to Airship from an external source using the custom event API. Custom events contain properties that you can use to personalize messages. with the name button--<BUTTON_ID>, where BUTTON_ID is either the button’s label or ID (when using the API). These events are included in Message Reports, Event Tracking, and Real-Time Data StreamingA service that delivers engagement events in real time via the Data Streaming API or an Airship partner integration..
Airship provides 30+ predefined buttons, which have preset labels and actions. Some buttons support changing their associated actions.
You can also create custom buttons, which must be configured in your project before you can add them to a message. Custom buttons can be associated with Airship actions, or they can be associated with custom actions.
Interactive notification buttons are tied to an action within your app, so a developer must first update your app, registering new categories in the Airship SDK.
After your developer registers the new categories, you can add buttons to your project. You will need the category name for each button.
Enable Notification Buttons
- Go to Settings » Project Configuration and click Manage for Dashboard Settings.
- Enable Notification Buttons.
Create a New Notification Button
- Go to Settings » Channels » Mobile Apps and click Manage for Mobile App Notification Buttons.
- Click New Notification Buttons.
- Enter a Name and Description for the button, so you can identify it.
- Enter the Category Name that is passed to the mobile device to identify which notification buttons to display with a message.
- (Optional) Clear the Enabled box if you do not yet want these buttons to appear in the list of buttons when composing messages.
- Specify the label and actions for each button. You must configure at least one.
- Button Label: Identifies button label for display purposes in the dashboard. Should match the label defined in the app. Does NOT change button labels in app.
- ID: Associates actions with the correct button label when passed by message.
- Foreground or Background: Controls which actions are available in the dashboard. Must match button ID defined in the app.
- Destructive: Indicates if button action causes the removal of data, features, etc. Appears red on iOS. Must match capability defined in the app. Check the box to enable.
- Click Save.
Include a Button in a Message
In the Content step of a composer for push notifications and in-app messages:
- Enable Buttons.
Click Select buttons, then search for and select the buttons you want to add.
- Search for predefined buttons by type. See reference: Built-In Interactive Notification Types.
- Search for custom buttons by name as configured for your project.
(Optional and if available) Change the action associated with each button.
(Optional) Set and/or remove TagsMetadata that you can associate with channels or named users for audience segmentation. Generally, they are descriptive terms indicating user preferences or other categorizations, e.g., wine_enthusiast or weather_alerts_los_angeles. Tags are case-sensitive. when the user taps a button.
- Click Configure options.
- Select Add tag or Remove tag, then search for tags that exist in the system, or create a new tag.
Click Configure another option for additional tags.
(Optional) Opt a user in to or out of a Subscription ListAn audience list of users who are opted in to messaging about a specific topic. Users can manage their opt-in status per list using a Preference Center. when the user taps a button. AXP iOS SDK 16.9+Android SDK 16.7+
- Click Configure options.
- Select Opt in to or Opt out of, then search for a subscription list by name. When you first click the search field, you can select from your five most recently modified subscription lists.
Click Configure another option for additional subscription lists.
Categories