Email content
Send messages to your email channel.
About email
You can send email to your registered users. Email features include:
- Segmenting and targeting users, including Named UsersA customer-provided identifier used for mapping multiple devices and channels to a specific individual.
- Registration and unsubscribe capabilities
- Aggregate dashboards for real-time updates
- Performance AnalyticsA customizable marketing intelligence tool that provides access to reports and graphs based on engagement data. support to view send and deliverability metrics
- Real-Time Data StreamingA service that delivers engagement events in real time via the Data Streaming API or an Airship partner integration. support to send deliverability metrics to a central data lake
Use cases:
- Multi-channel transactional messaging
- Urgent transactional message directed to multiple channels, e.g., send notification via both push and email
- Notification-style email
- Promotional blast messaging: great for Retail, Sports/Entertainment, and Travel verticals
- Breaking news alerts for the Media industry
- Promotional mobile wallet delivery, such as coupons and loyalty cards
- Priority channel
- Allow users to set their preferred delivery channel as email for certain types of messaging, so as not to alert them on multiple channels, e.g., app and web, for the same content
Industry examples:
- Retail — Send an email for app re-acquisition if a user churns, onboarding, coupon and loyalty pass delivery, and more.
- Media — Send highly-segmented news updates.
- Travel and Hospitality — Send boarding passes, day of travel updates, and reservation reminders.
Appearance and behavior
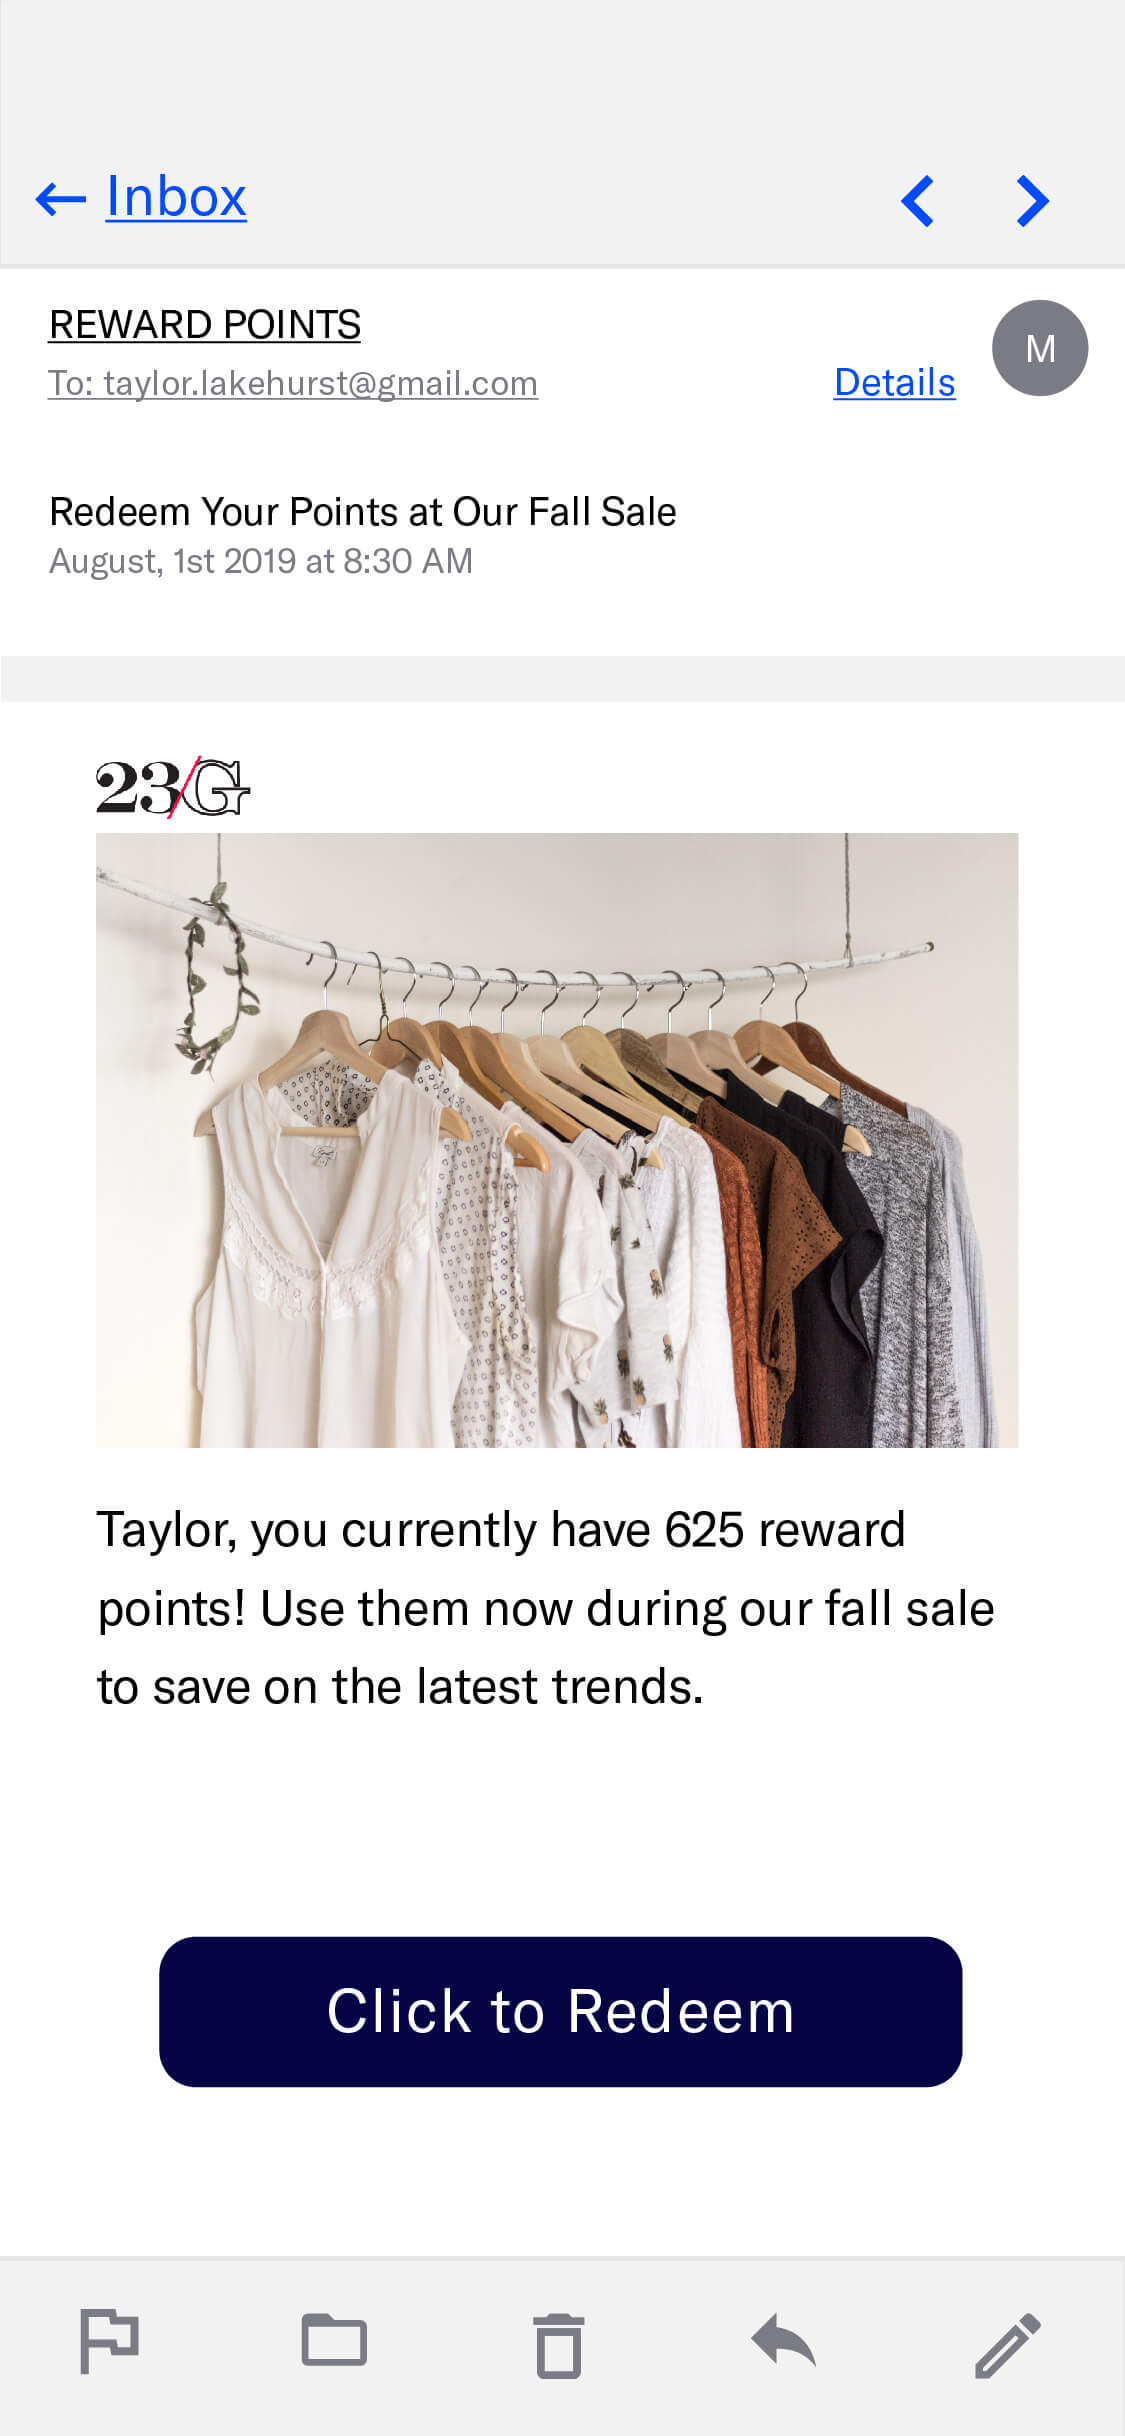
Email appears in the recipient’s inbox and is displayed upon opening the message. Email is PersistentMessage content that remains available even if the alerts for the message are dismissed. For example, Message Center, email, and SMS content can be viewed in the app’s Message Center, email inbox, or the device’s native SMS client until the message is deleted by its recipient. Non-persistent message types become unavailable when users dismiss them. A message’s linked content, e.g., a web link, deep link, an Apple News story, remains available as determined by the source host., remaining viewable until deleted by the user.
Components of an email:
Subject — Preheader text is optional.
Message body — HTML is optional, plain text is required. Users who cannot receive HTML emails will receive the plain text version. See also: Media guidelines.
An unsubscribe link is required within the message body for commercial email. You can also provide unsubscribe links for messages sent to Subscription ListsAn audience list of users who are opted in to messaging about a specific topic. Users can manage their opt-in status per list using a Preference Center.. See: Email unsubscribe links.
For the HTML body, you can either provide your own HTML or design using Airship’s WYSIWYG Editor. The WYSIWYG editor produces HTML that is compatible with any email client that accepts HTML emails, making sure that your audience sees the best version of your message. As new versions of Outlook and other clients are released, we make sure both your HTML will work with them too. You can choose one of Airship’s default layouts to get started, or you can design your own. You can also save layouts you design and reuse them for other messages.
Plain text generation
When using the WYSIWYG editor for an email HTML body, you can automatically generate a plain text version. Your HTML content, including links, is converted and populated into the Plain text body field. You can then edit the plain text version as needed.
Blind copies
Contact your Airship account manager if you want to enable BCC capabilities and send blind copies (BCC) of your emails. Because emails can contain personal information about your audience, you must register the addresses that you want to use for blind copies with Airship. It’s important to keep email volume in mind when using BCC. When you send a message with BCC enabled, your BCC addresses will receive emails for every member of your audience.
Preheader text
Preheader text is a short line of text that displays after or below an email subject line in an inbox. You can also have the text appear in the message body. Preheader text is an easy way to expand on your subject line and improve email open rates. Not all email clients support preheader text. These examples show preheader text following the subject “Undock is Launching”:

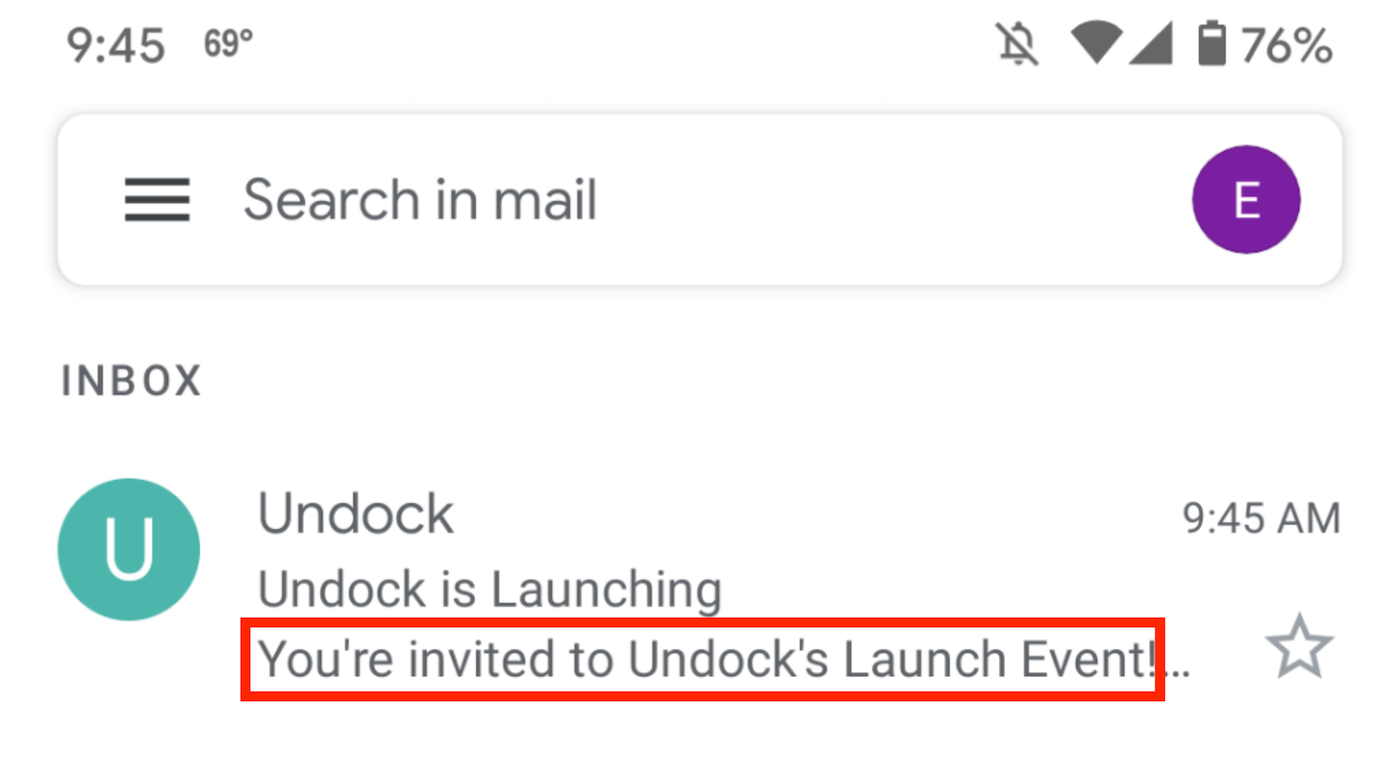
While some clients will display more than 100 characters, we recommended 40-100 characters, to make sure your message is fully displayed in most email clients and browser windows. However, if most of your recipients are opening their messages on mobile devices, consider keeping your character count on the lower end, since many devices display an average of 35-50 characters.
The WYSIWYG editor supports preheader text in the inbox, or in both the inbox and the body of the message. See: Preheader Text For Email.
If providing your own HTML, you can add preheader text that appears in the inbox only. Add this snippet of code to the top of your HTML body, and edit “Preheader text goes here.” with the message you’d like to use:
<div style="display:none !important;
   visibility:hidden;
   mso-hide:all;
   font-size:1px;
   color:#ffffff;
   line-height:1px;
   max-height:0px;
   max-width:0px;
   opacity:0;
   overflow:hidden;">
Preheader text goes here.
</div>
Sender information
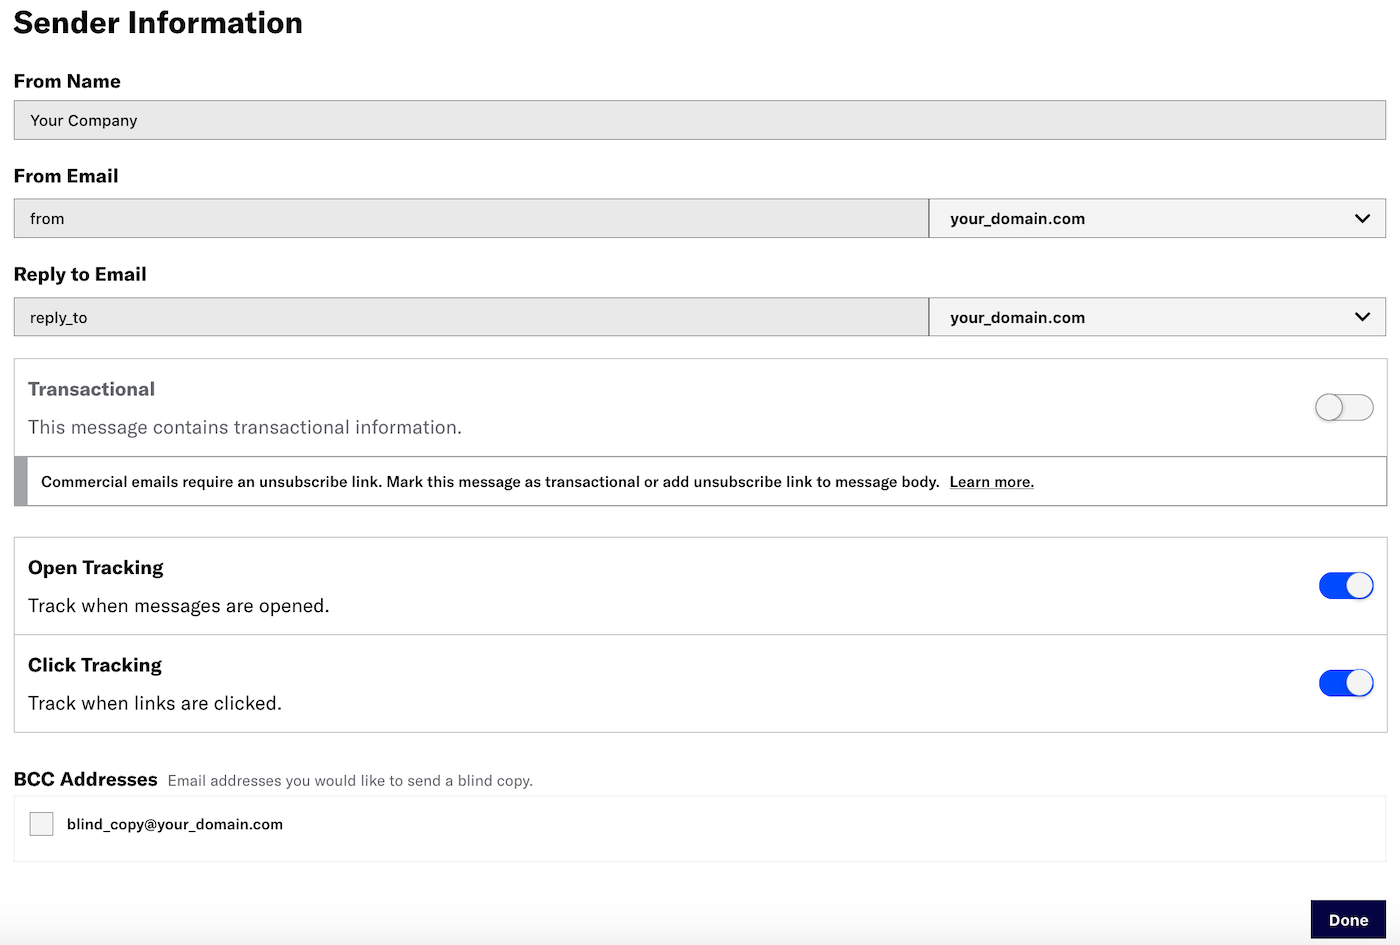
You can edit your sender information and set related behaviors when composing an email:
- From Name, From Email, and Reply to Email
- Transactional designation
- Bypass opt-in status
- Open and Click tracking
- BCC addresses
See descriptions and configuration information below in Creating content.
Unsubscribe events
Airship reflects unsubscribe events in the Real-Time Data Stream. When users unsubscribe, Airship also assigns them commercial_opted_out or transactional_opted_out values based on the type of email they unsubscribed from.
Preference centers
A Preference Center is a page where users can manage their opt-in statuses for the Subscription Lists in your project. Preference Centers are presented within your app or website or as an Airship-hosted web page.Design a web page in the Airship dashboard and select a preference center to appear on the page. After saving, copy the web page link and include it in your email to a subscription list. No development work is required.
See: About preference centers.
Size limit and HTML minification
Message size should not exceed 100 KB, as email clients typically truncate content larger than 103 KB. If you need to provide content exceeding this limit, link from the email to web-hosted content.
Reducing message size can help with deliverability and avoiding message truncation by email clients. When using the WYSIWYG editor for an email HTML body, you can reduce the overall size of your content by up to 25% by compressing code spacing and removing unused class names and CSS styles. Select Settings in the sidebar, and then enable Minify HTML. When applying the setting to an existing message, you do not need to change anything else in the message before saving.
You can request enabling Minify HTML by default for all new messages and templates. Contact Support and include your project App Key, which you can copy from Settings.
Inbox preview
Inbox previews must be enabled for your account. Contact your Airship account manager if they do not appear for your projects.
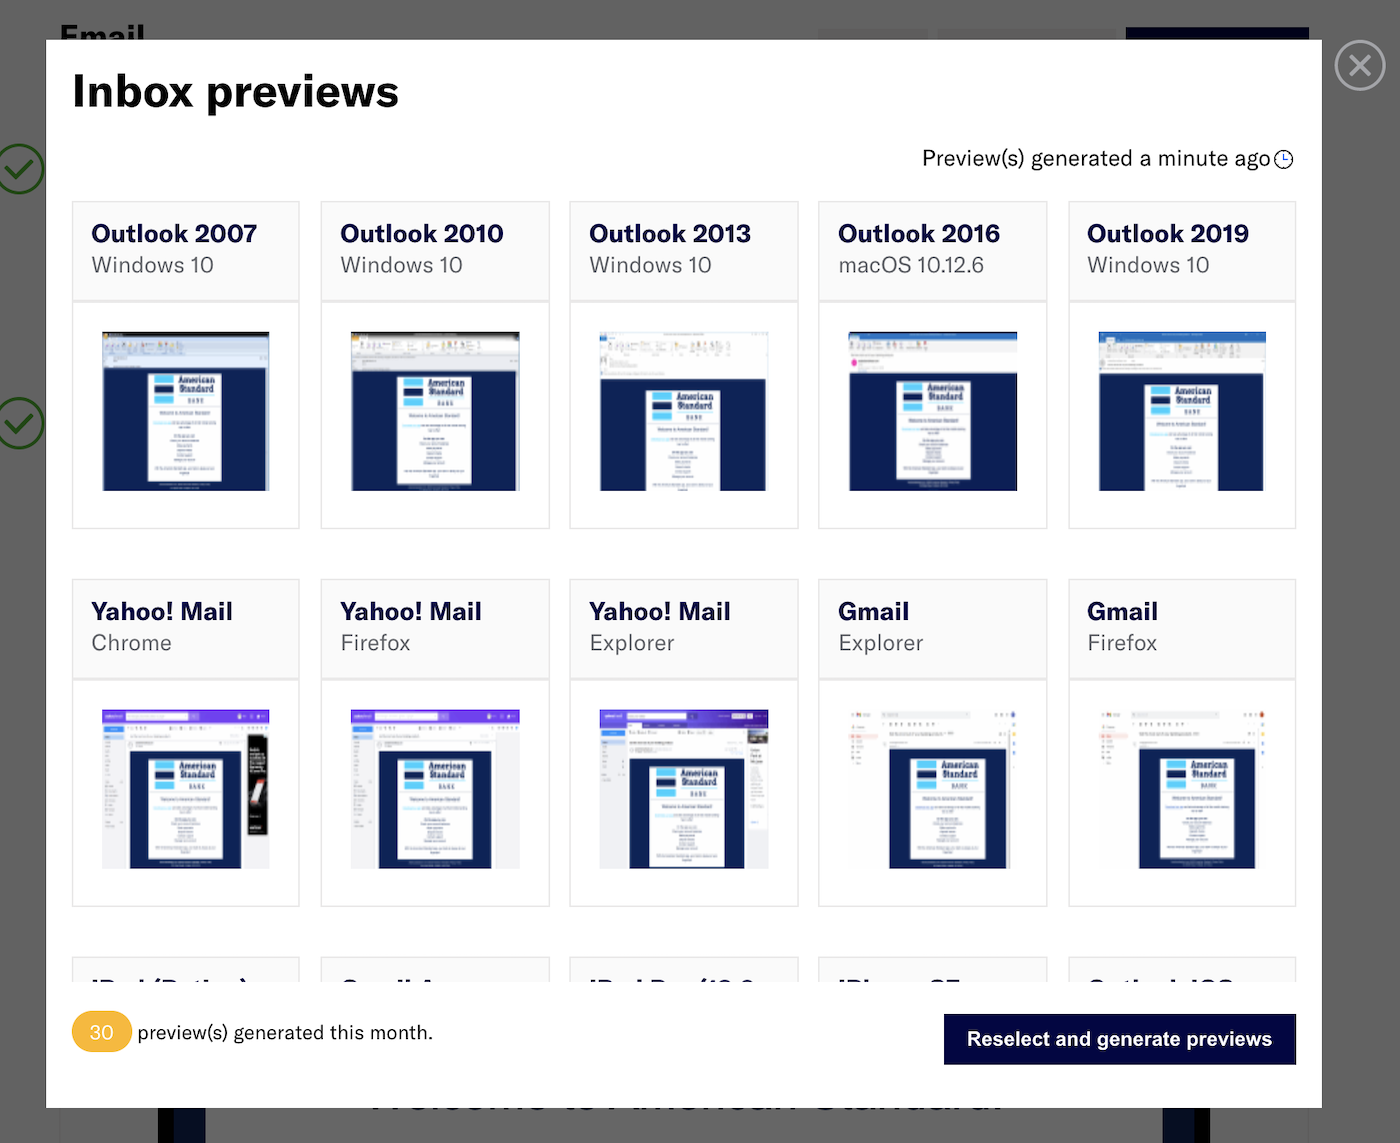
Before sending your message, you can preview what it will look like in various email clients. After adding the HTML body, click Inbox preview and select from the listed browser, desktop, and mobile clients. 90+ different client and device combinations are supported.
You can generate inbox previews for email in the Message, Automation, Sequence, or A/B Test composers, and when creating a content template.
- Each individual browser, desktop, or mobile selection counts as 1 preview. If you edit a message and then regenerate previews, the new previews are counted separately from the original previews.
- Each Airship project includes a limited number of free previews per month. Additional previews are billed at the end of the month.
- Your preview count for the current month is displayed at the bottom of the inbox preview modal. The number of previews to generate appears after you select clients.
Creating content
You configure the appearance of the message in the Content step of a composer; in the Delivery step you can configure content-related features that do not affect the appearance of the message.
In the Content step, click Add content. Now you can configure the body of the message:
- For each section, click Edit or Add , make your changes, then click Done. Merge fields can be included in HTML and plain text content if you chose Upload Users in the Audience step.
- If your message includes HandlebarsHandlebars is Airship’s templating language for personalization. Handlebars expressions use double curly braces wrapped around a content template, ranging from a simple variable, e.g.,
{{first_name}}, to complex evaluations of personalization data., you can enable Preview Data to test how they will appear. See: Previewing personalized content.
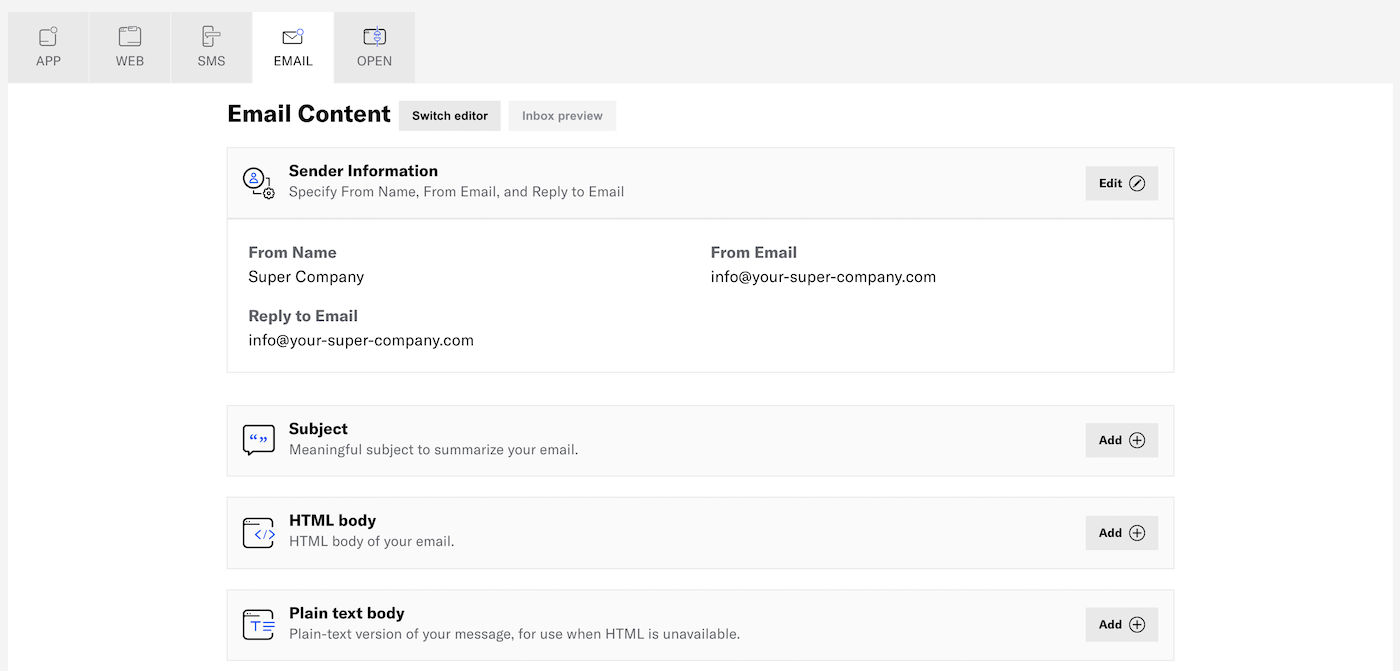
(Optional) Edit Sender Information:
Setting Description Configuration From Name, From Email, and Reply to Email The name and email addresses to use in the message header. They also appear in the user's email client. Edit the fields and select from available domains for the email addresses. For Reply to Email, leave field blank if replies should go to the address already entered in From Email. Transactional If the message is triggered by a user's action such as a password reset request, opt-in, shopping receipt, etc., you can designate it as transactional, and optionally include an unsubscribe link. See Commercial vs. Transactional Email The Content step is considered incomplete until an unsubscribe link is provided in the message body or the message is designated as transactional in Sender Information.
Enable to designate the message as transactional. Bypass Opt-in Status Sends the message to audience members even if they have opted out of transactional messages. This option appears if Transactional is enabled. Use for business-critical emails only. See Opt-in and Opt-out Requirements in Commercial vs. Transactional Email.
Enable to send the message to users who opted out of transactional messages. Open and Click Tracking Records an event when the email is opened and/or links are clicked. Only HTTP and HTTPS links are tracked. Enabled by default. When enabled, opens and clicks are tracked for all channels that have not been opted out. When disabled, opens and clicks are not tracked for any channels. See Contact Management to manage open and click tracking at the channel level.
Enable to track opens and clicks. BCC Addresses For accounts with email addresses registered with Airship for BCC capabilities. Sends a blind copy of the message to selected email addresses. Select email addresses. Add the Subject.
(Optional) Add the HTML body.
- For HTML, select the paste or upload option and add your HTML.
- For the WYSIWYG editor, first select a default or saved layout, or select Blank Layout to design your own. You can edit any layout after selecting. Then design your message. See: WYSIWYG editor.
In the WYSIWYG editor:
- To reduce the HTML size, select Settings in the sidebar, and then enable Minify HTML.
- After selecting Done, choose whether to save the HTML body only or also generate the plain text body.
Add the Plain text body or edit if populated in the previous step.
(Optional) Preview your email in different clients:
- Click Inbox preview.
- Select from the lists of browser, desktop, and mobile clients, then click Generate previews.
- Click a thumbnail to see the full version. Click to close and choose another preview.
- (Optional) To add/remove clients, click Reselect and generate previews and start over.
- When you are finished with inbox previews, click to close the modal.
Now you are ready to complete the remaining steps in the composer.
Categories
