Gimbal
AIRSHIP VERIFIED INTEGRATION
This integration is maintained by Gimbal. Please contact Gimbal for support.Gimbal sends their location data to Airship via Gimbal Adapters. An Airship Gimbal adapter is a drop-in class for iOS, Android, and Amazon that integrates Gimbal Places events with Airship.
The Gimbal data can then be used with the Custom Event TriggerA trigger that initiates an automation or sequence when a custom event associated with members of your audience occurs. in AutomationA set of conditions that your audience must meet before they receive a message. and SequencesA series of messages that is initiated by a trigger. Airship sends messages in the series based on your timing settings, and you can also set conditions that determine its audience and continuation. Sequences can be connected to each other and to other messaging components to create continuous user experiences in a Journey.. Gimbal is the system of record for their location data, and all updates to places data are managed by Gimbal.
Our [legacy integration] instead uses the Location TriggerA trigger that initiates an automation or sequence based on an audience member’s device location. and Location Attributes TriggerA trigger that initiates an automation or sequence based on key/value pair metadata associated with a particular location..
Gimbal integration requirements
- Accounts
- Gimbal
- Airship — Must include messaging
- Airship project
- The Airship SDK must use the same user identity as the Gimbal SDK.
Adding Gimbal adapters
Follow the installation instructions:
Configuring Gimbal integration
In Airship:
- Go to Settings.
- Under Project Configuration, select Manage for Partner Integrations.
- Select Gimbal.
- Select Configure for the inbound integration and follow the onscreen instructions to create the Custom EventsEvents that indicate that a user performed a predefined action, such as adding an item to a shopping cart, viewing a screen, or clicking an Unsubscribe button. Custom events can trigger automation, including Sequences, Scenes, and Surveys. You can code them into your app or website, or send them to Airship from an external source using the custom event API. Custom events contain properties that you can use to personalize messages.
gimbal_custom_entry_eventandgimbal_custom_exit_event.
Gimbal events and properties
When you configure the integration in the Airship dashboard, the following two custom events are created. Each event is followed by its associated properties and each property’s acceptable value.
- gimbal_custom_entry_event
- placeAttributes — Gimbal place attribute. Attributes are flattened and prefixed with
GMBL_PA_.
visitID — String
placeIdentifier — String
placeName — String
boundaryEvent — Number: 1 = Entry, 2 = Exit. - gimbal_custom_exit_event
- placeAttributes — Gimbal place attribute. Attributes are flattened and prefixed with
GMBL_PA_.
visitID — String
placeIdentifier — String
placeName — String
boundaryEvent — Number: 1 = Entry, 2 = Exit.
dwellTimeInSeconds — Number
Using the Custom Event trigger
In the Setup step in an automation or when configuring the Trigger for a sequence:
Select the Custom Event trigger.
Use the Events box to search for and select
gimbal_custom_entry_eventorgimbal_custom_exit_event.(Optional) Click Add Another to add more events. Airship handles multiple events as a boolean OR.
(Optional) Follow the Filtering Custom Events steps to add custom event filters. Refer to the properties for each event.
(Optional) Set the maximum age for the events. If an event is received after it is older than a certain age, the automation or sequence will not start.
- Enable Event Expiration.
- Enter a value in minutes, hours, days, months, or years.
Legacy integration
You cannot set up the legacy integration. You can only manage an existing legacy integration, and you can use Gimbal location data with the triggers.
Syncing events or removing the integration
- Go to Settings.
- Under Project Configuration, select Manage for Partner Integrations.
- Select Gimbal.
- Select Sync Now to sync Gimbal region events or Remove to remove the integration.
Using the Location trigger
You select a trigger in the Setup step in an automation or when configuring the Trigger for a sequence.
The Location trigger initiates an automation or sequence based on an audience member’s device location. You can select a maximum of 20 locations per automation or sequence.
Configuration steps:
Click Select a Location.
Enter a search term. Results, if any, display on the map and are listed on the Results tab. There are two types of locations available for selection: geofences and beacons.
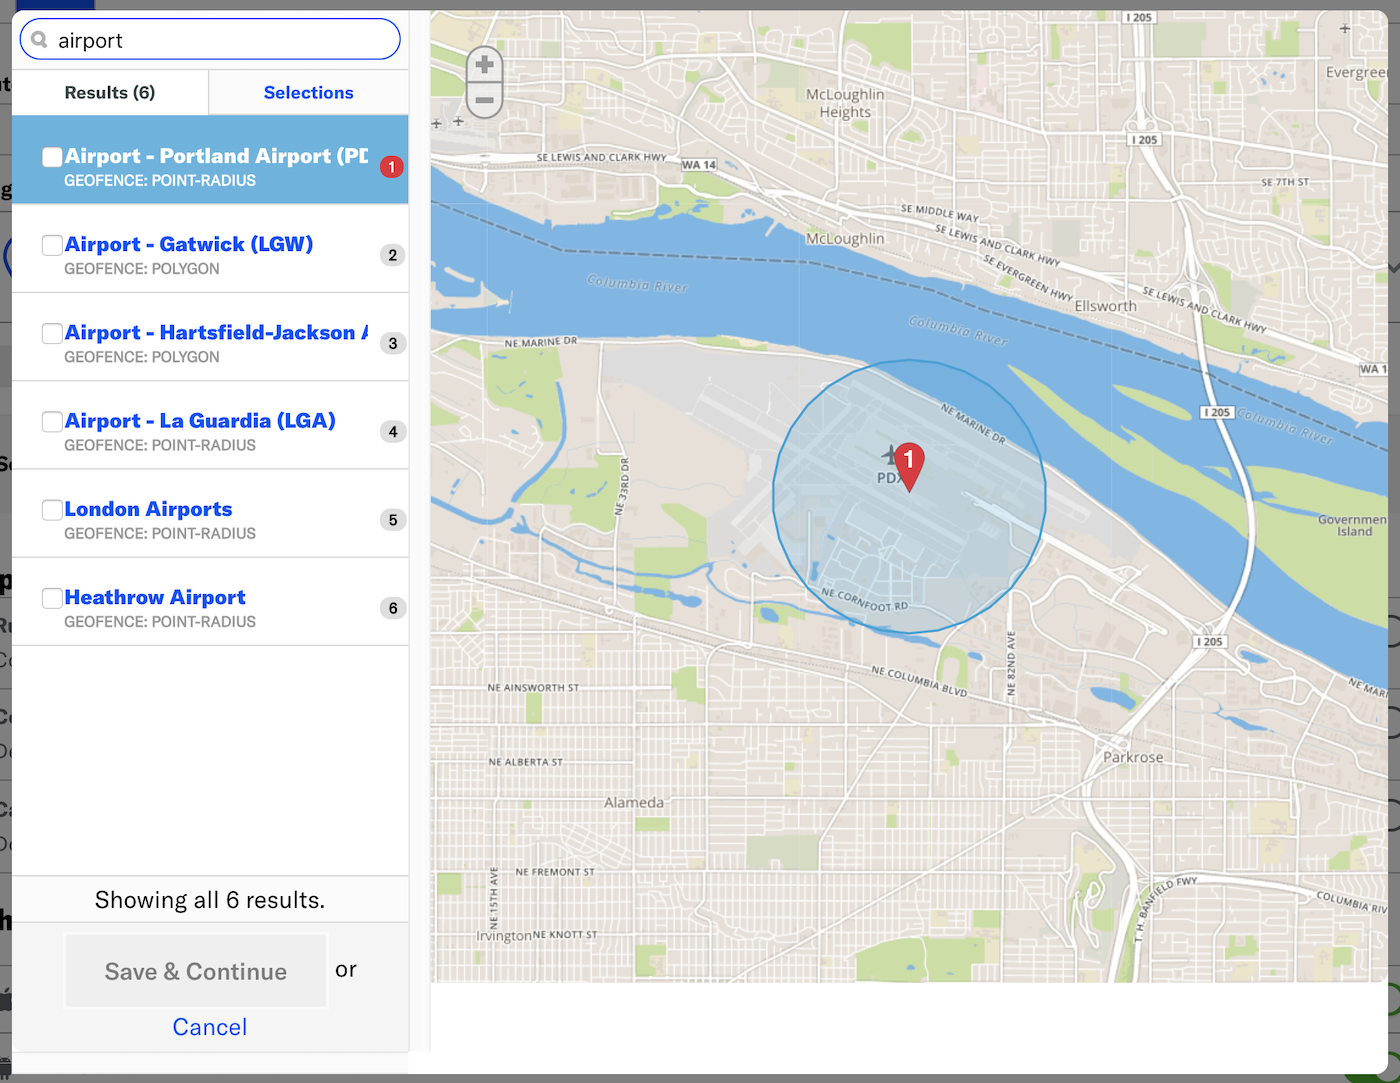
Click a result for a detailed view of a location.
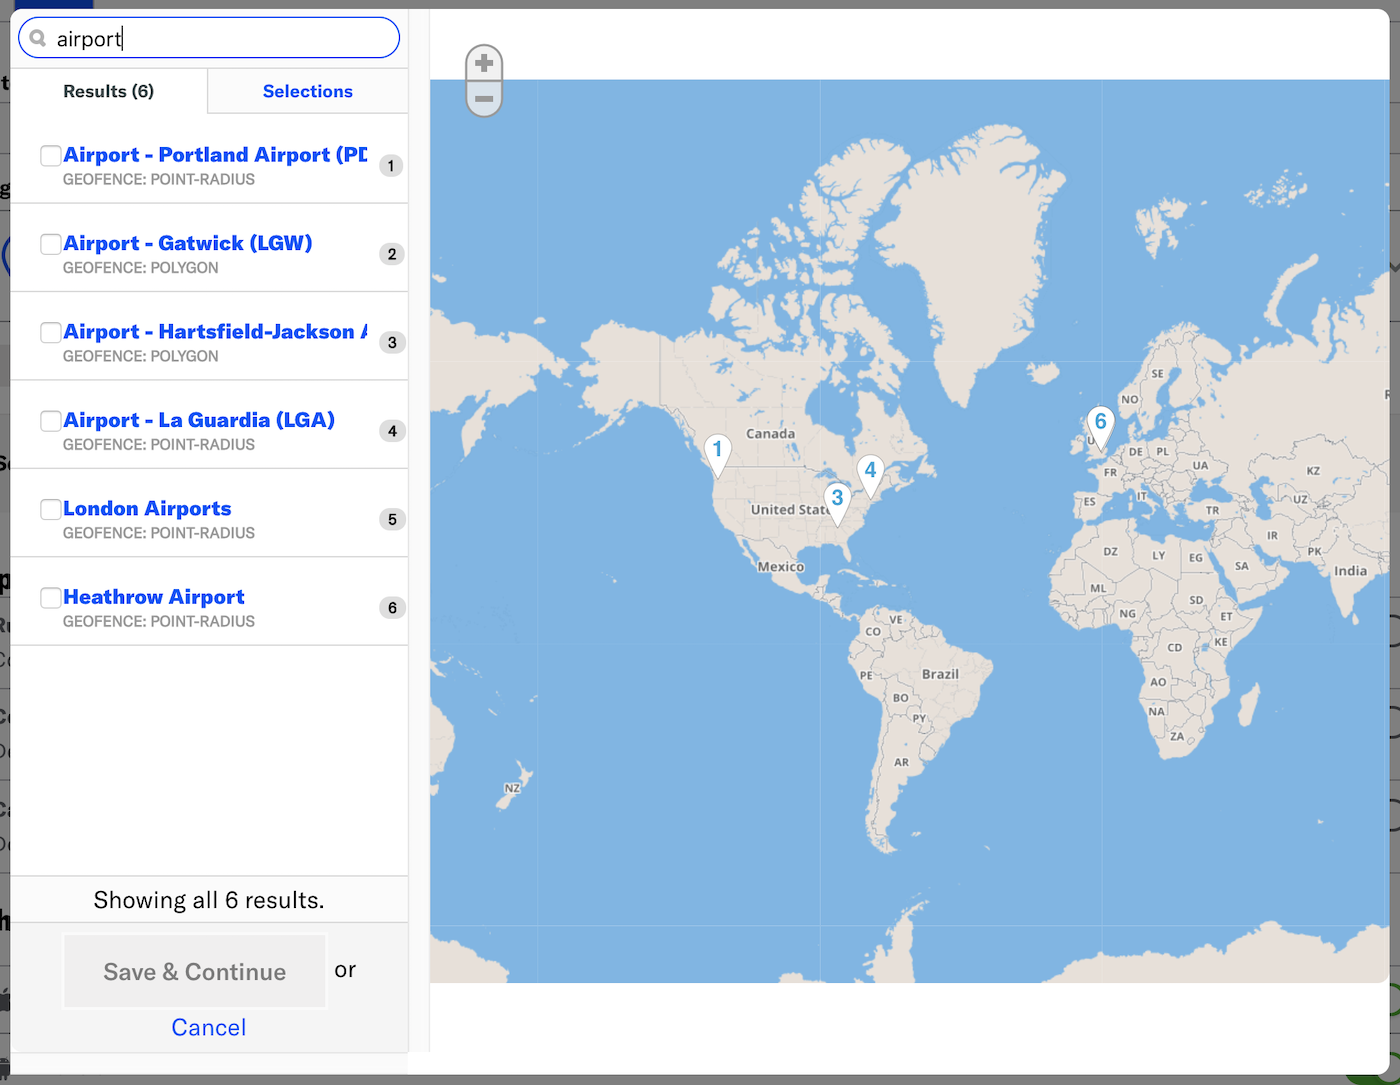
If selecting a geofence, the map will zoom to the selected location. Click and drag, and use the +/- zoom controls to change the displayed area.
On the Results tab, check the box next to the locations you want to use as the trigger.
Review the Selections tab, then click Save and continue.
(Optional) Click Select a Location to add more locations.
Choose whether to trigger your automation or sequence when the user enters or exits a location.
Using the Location Attributes trigger
In the Automation composer, you configure a trigger in the Setup step.You select a trigger in the Setup step in an automation or when configuring the Trigger for a sequence.
The Location Attributes trigger initiates an automation or sequence based on key/value pair metadata associated with a particular location. You can add a maximum of 50 location attributes per automation or sequence.
Configuration steps:
Enter a key/value pair for the location you want to use as the message trigger.

(Optional) Click to add an alternative location attribute.
(Optional) Click Add Another to add more location attributes.
Select ALL/ANY to determine how to evaluate multiple location attributes and alternatives within each location attribute.
- ALL = all criteria must be met (boolean AND)
- ANY = any criteria must be met (boolean OR)
Note By default, the automation or sequence is triggered if the audience meets ALL the location attributes. For example, if you selected ALL, with attributes
half_offandhas_cafe, you’d only reach users who enter or exit locations that meet both conditions. If you select ANY, you’d reach all users who enter a location running a half-off campaign as well as all users who enter a location that has a cafe.Choose whether to trigger your automation or sequence when the user enters or exits a location.
Gimbal key terms
- Location
- A location is a logical place defined by a set of beacons and/or geofences. Locations are the logical entities that are signalled by devices and may be used to trigger automations and sequences.
- Attributes
- Attributes are key/value pair metadata associated with a particular location, e.g., chain:BobsBurgers, has_blender:yes. Attributes must be defined and assigned to a particular location in the Gimbal system and synced with an Airship account.
- Beacon
- A beacon represents a physical device used for proximity detection. Beacons may represent hardware implementing the iBeacon standard for use with iOS, or proprietary beacons (such as Gimbal beacons) for use with Android. Beacons may or may not have geolocation data associated with them.
- Geofence
- A geofence represents a fixed location representable by one or more points in the WGS coordinate system . Geofences can consist of a single point and a radius expressed in meters, defining a circular region, or a series of points defining a polygon.
- Place
- The Gimbal system refers to your app’s locations as Places. A Place is
either a single geofence, one or more beacons, or one or more beacons and a
geofence.

Categories