Create pass links using CSV upload
Format and upload a CSV file to create pass links.
About CSV upload
To create pass links using CSV upload, your CSV file must be formatted with columns that match the field layout for your pass template. After uploading the CSV file in the dashboard, you will receive a link to download the processed file appended with the pass URLs. You can then distribute the URLs/links to your users.
The CSV upload method does not generate Adaptive LinksA vendor-agnostic, shortened mobile wallet pass link that supports templates for both Google Wallet and Apple Wallet. When a user taps the link, Airship determines the user’s platform and generates the right pass for that platform..
The URLs returned by the CSV upload are multi-use passes — they can be downloaded by multiple devices.
URLs are Dynamic — Viewable passes are not generated until the user interacts with the pass URL and installs the pass on a device. Due to the dynamic nature of pass URLs, keep in mind the following:
- When a pass is created with specific values, the pass cannot be updated until after it has been installed.
- If a template is changed before a pass is installed, the pass will have the newest template state.
- Caution: Creating multiple passes with a single external ID will cause any pass after the first one that is installed to fail and send an error message. Make sure that each pass has a unique external ID.
CSV Formatting
Find the headers you will use for your CSV:
- Go to Templates.
- Select the template that will serve as the base model for your passes, then click Edit Design.
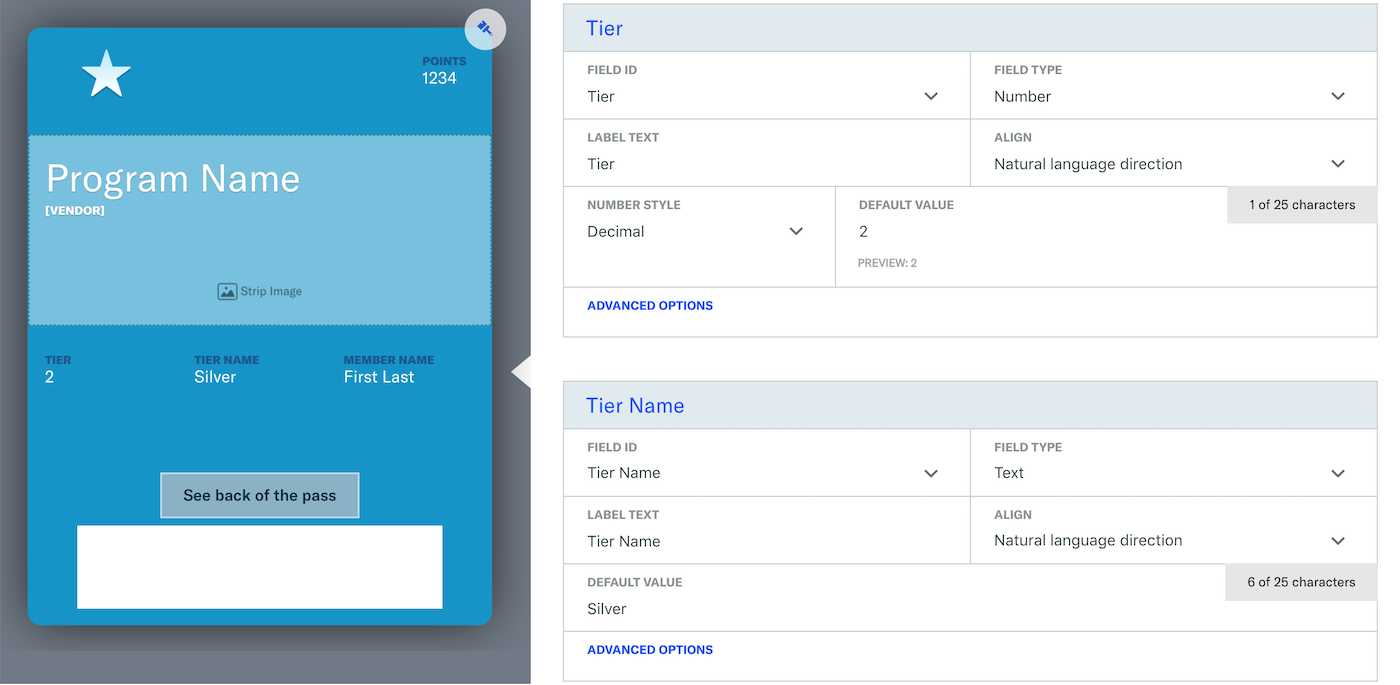
- Use the field names as the initial data in your CSV file. The field names
shown in this image are Tier and Tier Name.

Now you can create a CSV file with a header row that specifies field names, followed by rows specifying values for each field name. Each row represents a single pass.
You will be able to map your CSV headers to the correct Field Names after import.
We recommend your CSV file contain no more than 500,000 rows. The CSV file size limit is 250 MB, but there is no limit to the number of passes you can create this way.
In addition to columns specifying each field name, you can also include columns for:
barcode_value: Provide custom barcode values for each pass.externalId: The external identifier value specifies a user ID in a backend system (e.g. a CRM database) that you can use to map a pass to your data. For example, if a customer receives a pass with anexternalIdvalue that links to an ID in your backend loyalty system. When your customer makes a purchase that earns loyalty points, you can update his or her pass can with this new data. This field must be unique. Airship will not process rows containing duplicateexternalIdvalues.
Here is the start of a valid CSV file:
The only date format accepted for Google templates is YYYY-MM-DD.
Upload Your CSV and Map Fields
- Go to the same project and template used when formatting your CSV.
- Click Batch Importer.
- Click Select a .csv file and choose your file.
- Matched CSV headers and Field Names will auto-select. Use the dropdown menu to select the correct Field Name per CSV header, or leave blank if there is no corresponding Field Name or if you wish to not match to the CSV header, e.g. a field name matches but you don’t want it displayed on the pass.
- Click Confirm Mapping after you have completed mapping each field.
- Enter your email address. This defaults to the email address in your Airship account, but you can enter any valid email address.
- Click Process CSV.
Pass URLs
When your CSV file has finished uploading/validating, an email confirmation and a download link will be sent to the provided address.
The validation process will search for errors, and if any are detected, the
email will direct you to the offending line(s). Once your CSV file has finished
uploading/validating, an updated CSV file containing Pass ID and
Download URL columns will be sent to the given address.

Each URL can be used to download the associated pass. The updated file will also be available via the Download CSV file button.
When you receive the processed CSV file, an additional column titled Download URL is added to the file. The URLs in the Download URL column are formatted like so:
https://wallet-api.urbanairship.com/v1/pass/dynamic/2931580989855247863.50827_457a6a69-cea8-4bbe-860a-aba56ee5a269In the above example URL, 2931580989855247863.50827_457a6a69-cea8-4bbe-860a-aba56ee5a269
is the internal reference ID that you will need when referencing this pass via
the Wallet API.
URLs that are not activated will expire after 6 months.