Install & Setup the Unity Plugin
How to install the Airship Unity plugin.
Requirements
- Unity 5+
- iOS: Xcode
15.3+ - iOS: Minimum deployment target iOS
15+ - Android: Android SDK installed and updated (requires
minSdkVersion=23+) - Android: Using Android SDK manager, install API
36+.- If a Custom Gradle Template is used, the gradle template needs to be configured to use API VERSION
36+.
- If a Custom Gradle Template is used, the gradle template needs to be configured to use API VERSION
Setup
Download the latest plugin
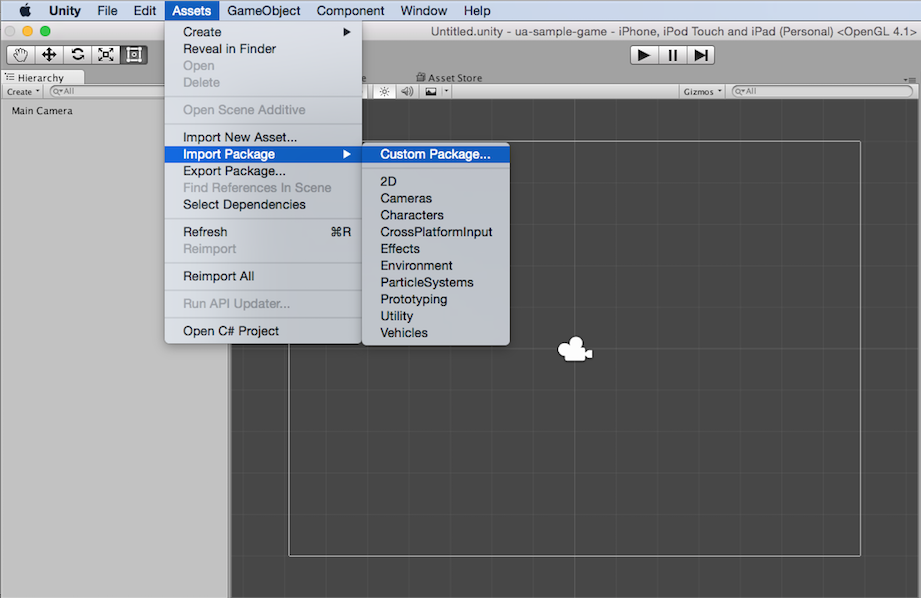
and import the unitypackage into the Unity project: Open Assets -> Import Package -> Custom Package.

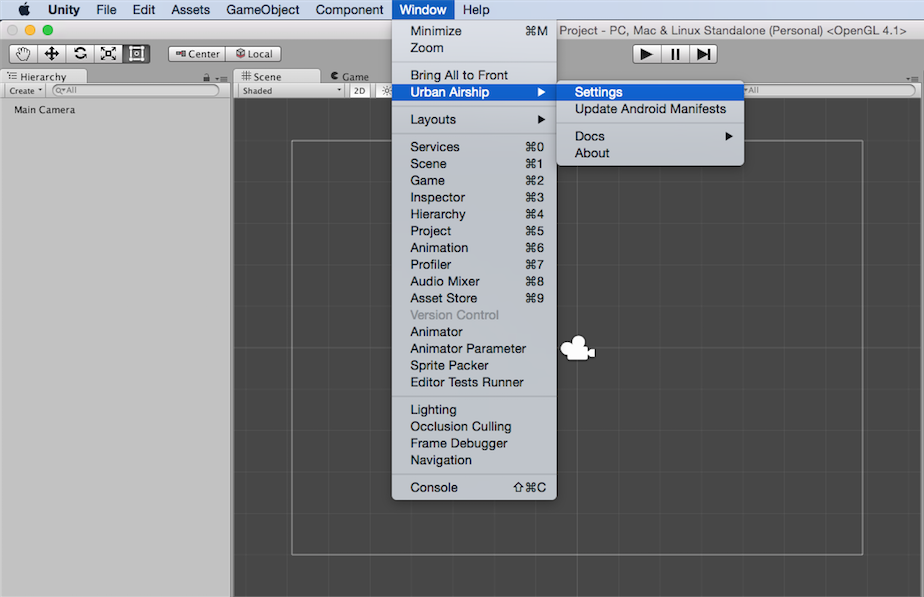
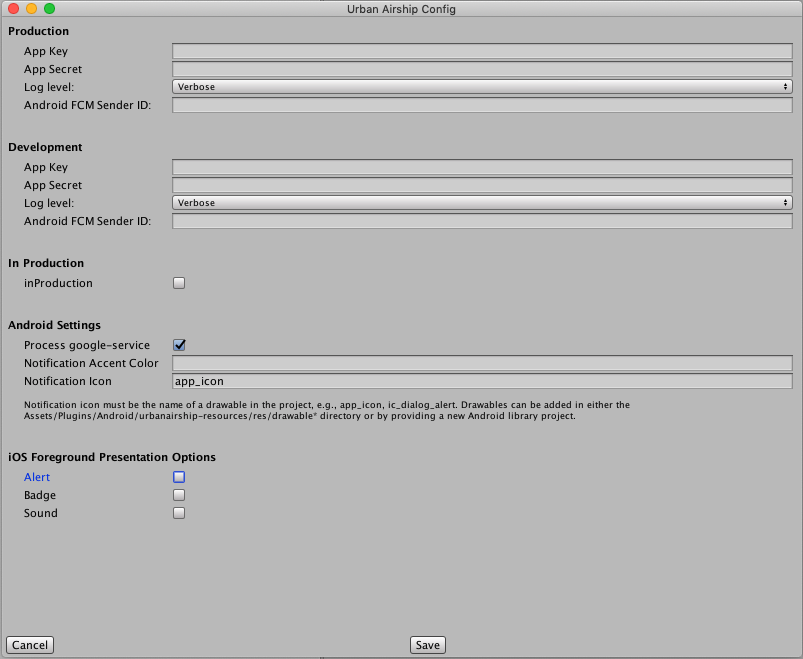
Configure Airship Settings: Open Window -> Airship -> Settings and set the Airship settings.
Leave the Android FCM Sender ID field BLANK for both Production and Development.
If your app uses Airship’s EU cloud site, you will need to configure that using the Cloud Site setting.
If proguard is enabled, add Airship settings to the proguard-user.txt file:
-keep public class com.urbanairship.unityplugin.UnityPlugin
-keepclassmembers class com.urbanairship.unityplugin.UnityPlugin {
public ;
public ;
static ;
}
For push notification setup, see the Push Notifications Getting Started guide.
Troubleshooting
A common error when setting up our Unity plugin is “Could not create an instance of type org.gradle.initialization.DefaultSettings_Decorated”. If you encounter this error, take these steps in the Unity Editor:
Go to Assets, then External Dependency Manager, then Android Resolver, then Force Resolve.
Sometimes Unity has difficulty retrieving the JDK installed with your editor even when selected. To solve this:
- Go to Edit, then Preferences, then External Tools.
- For JDK, select Copy Path, uncheck JDK Installed with Unity (Recommended), then paste the path.

Setting the JDK path in the Unity Editor 
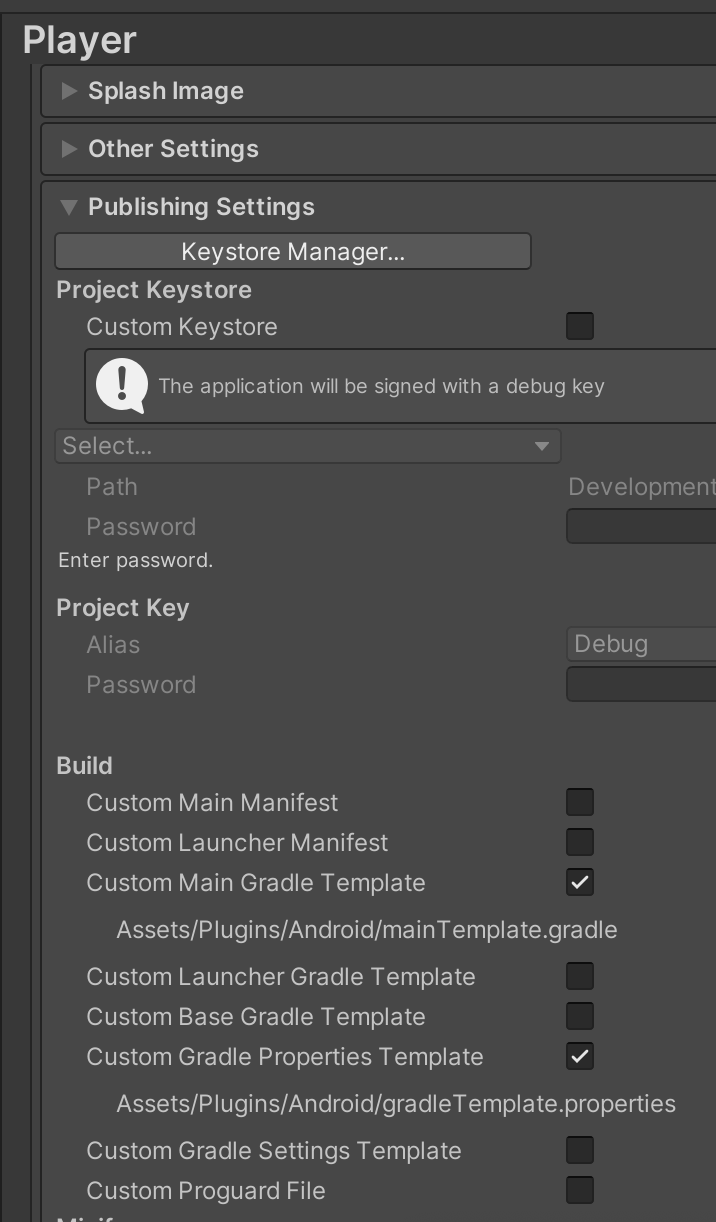
Enabling project templates in the Unity Editor If the previous steps do not fix your issue:
Go to Project Settings, then Player, then Android, then Publishing Settings, then Build, and then select Custom Main Gradle Template and Custom Gradle Properties Template.
Go to Assets, then External Dependency Manager, then Android Resolver, then Force Resolve.

