Push Notifications for the Flutter Plugin
Set up push notifications for Flutter applications on iOS and Android.
Before you can send and receive push notifications, you need to configure your app for the platform(s) you’re targeting.
Platform Setup
Follow the platform-specific setup instructions below to enable push notifications in your Flutter app.
iOS
Configure iOS capabilities and extensions to enable push notifications.
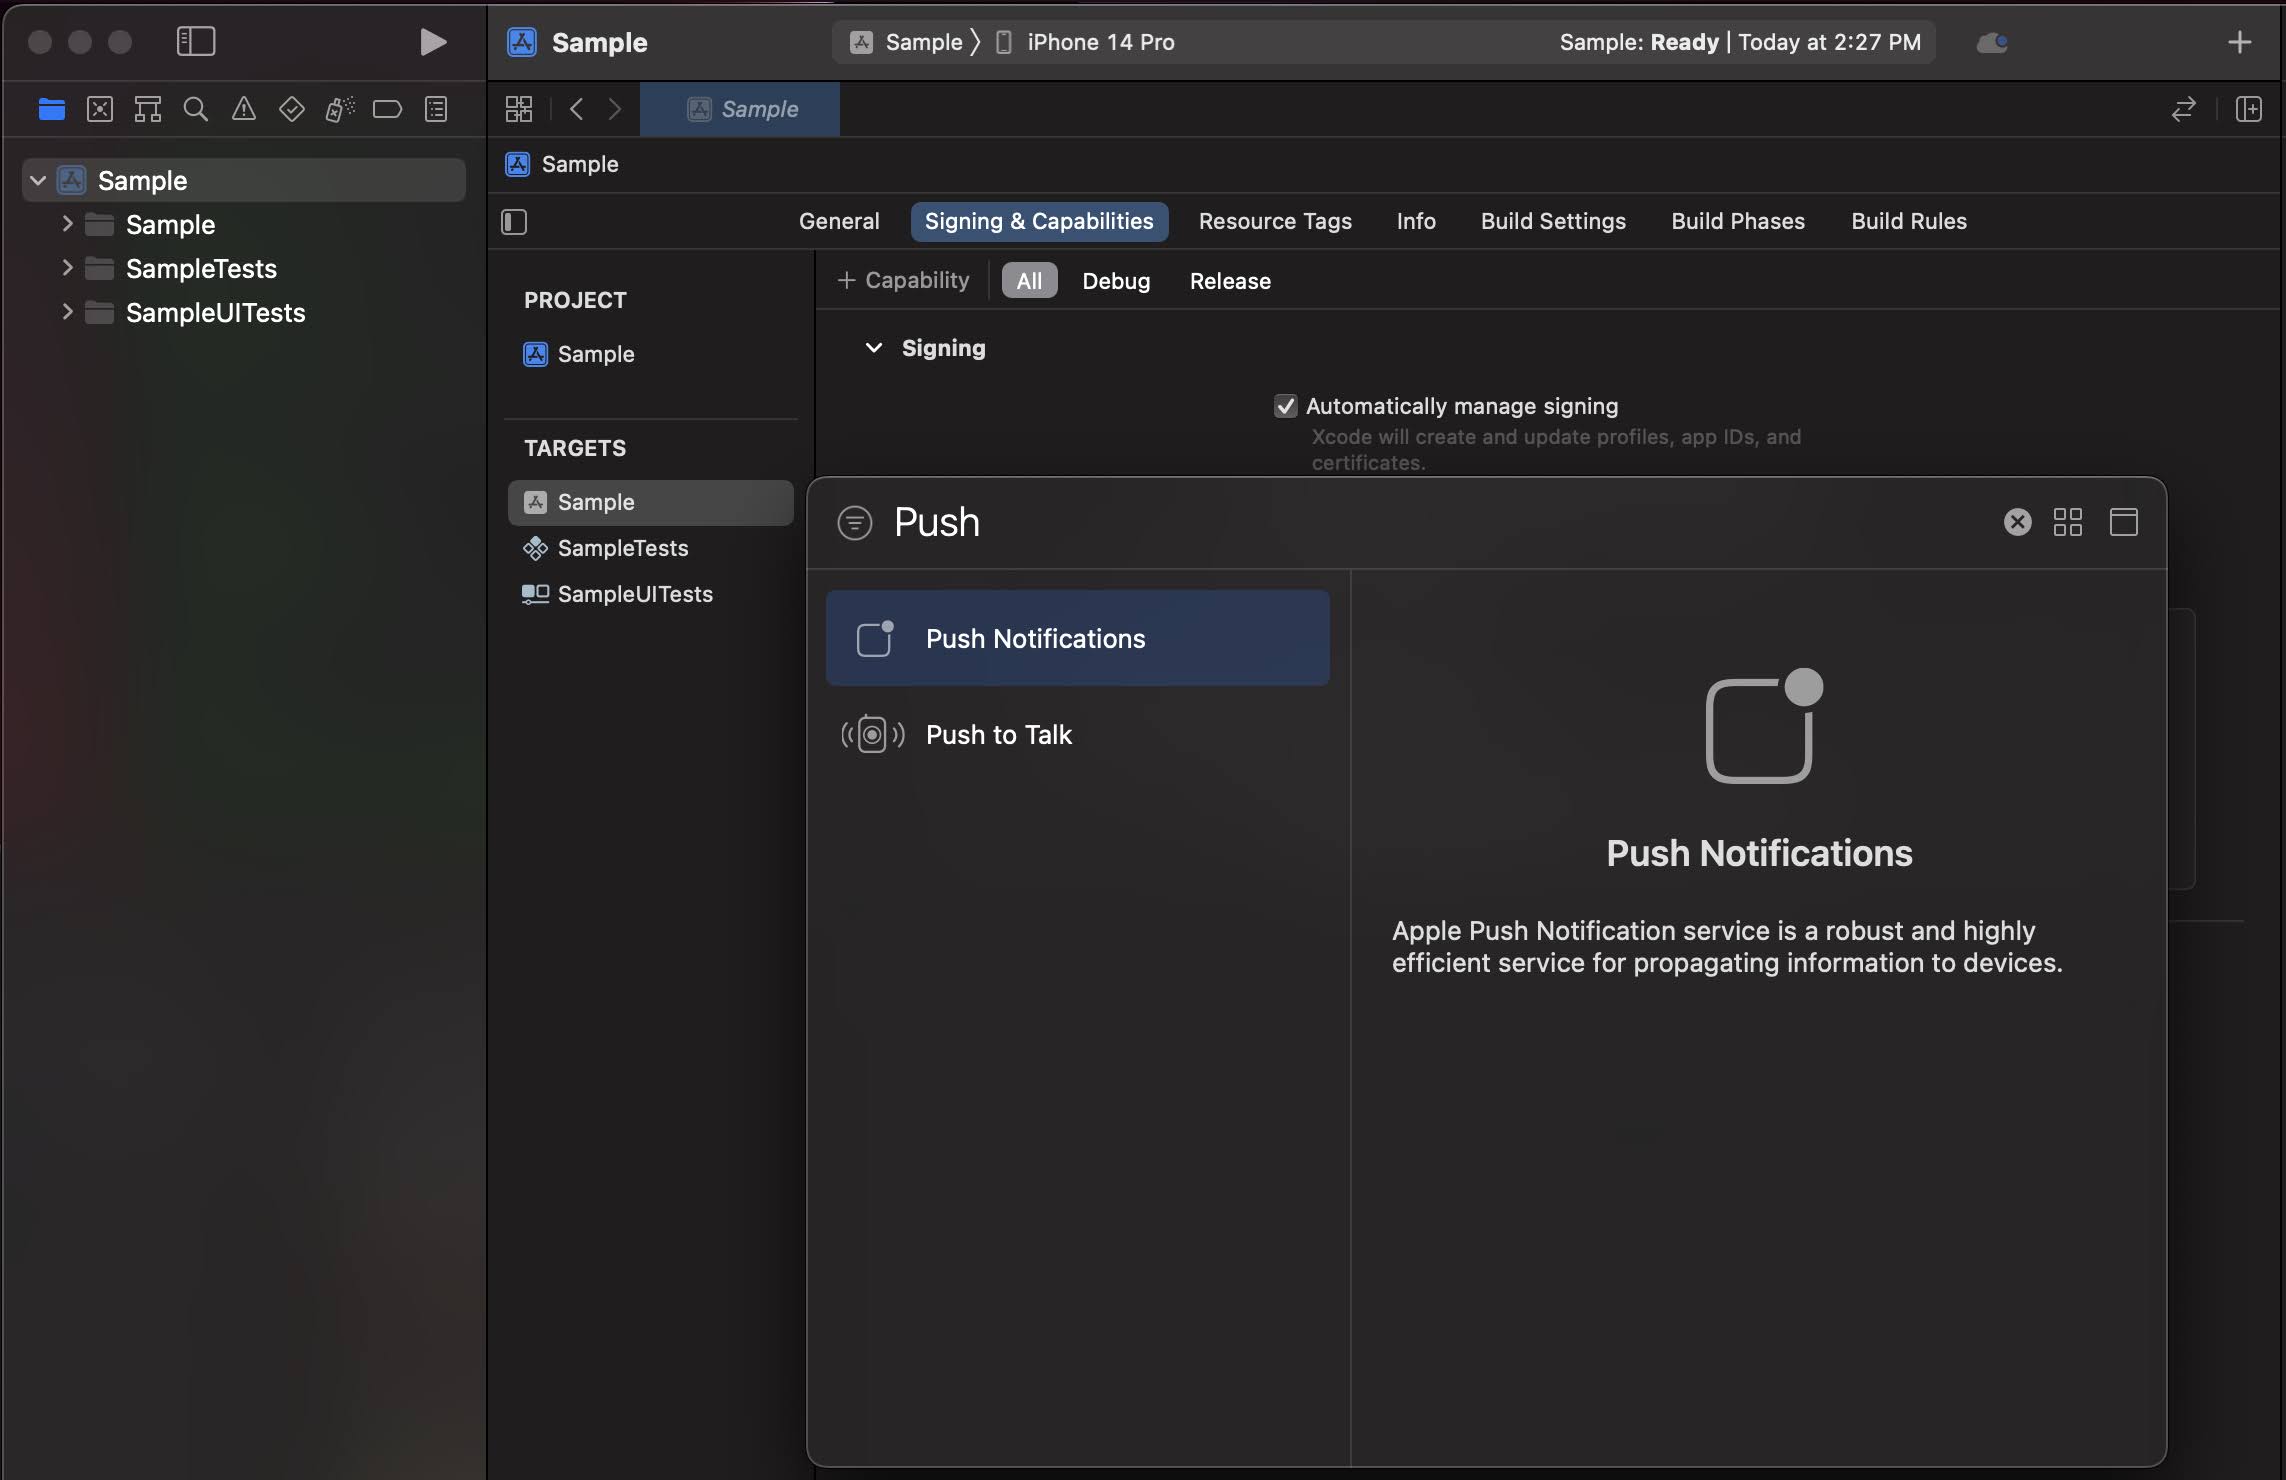
Enable Push Notifications Capability
Open your Flutter project’s iOS module in Xcode:
- Navigate to your Flutter project directory
- Run
open ios/Runner.xcworkspace(or open the workspace file manually)
Select your app target in Xcode, then go to Signing & Capabilities.
If you do not see Push Notifications enabled, click + Capability and add Push Notifications.

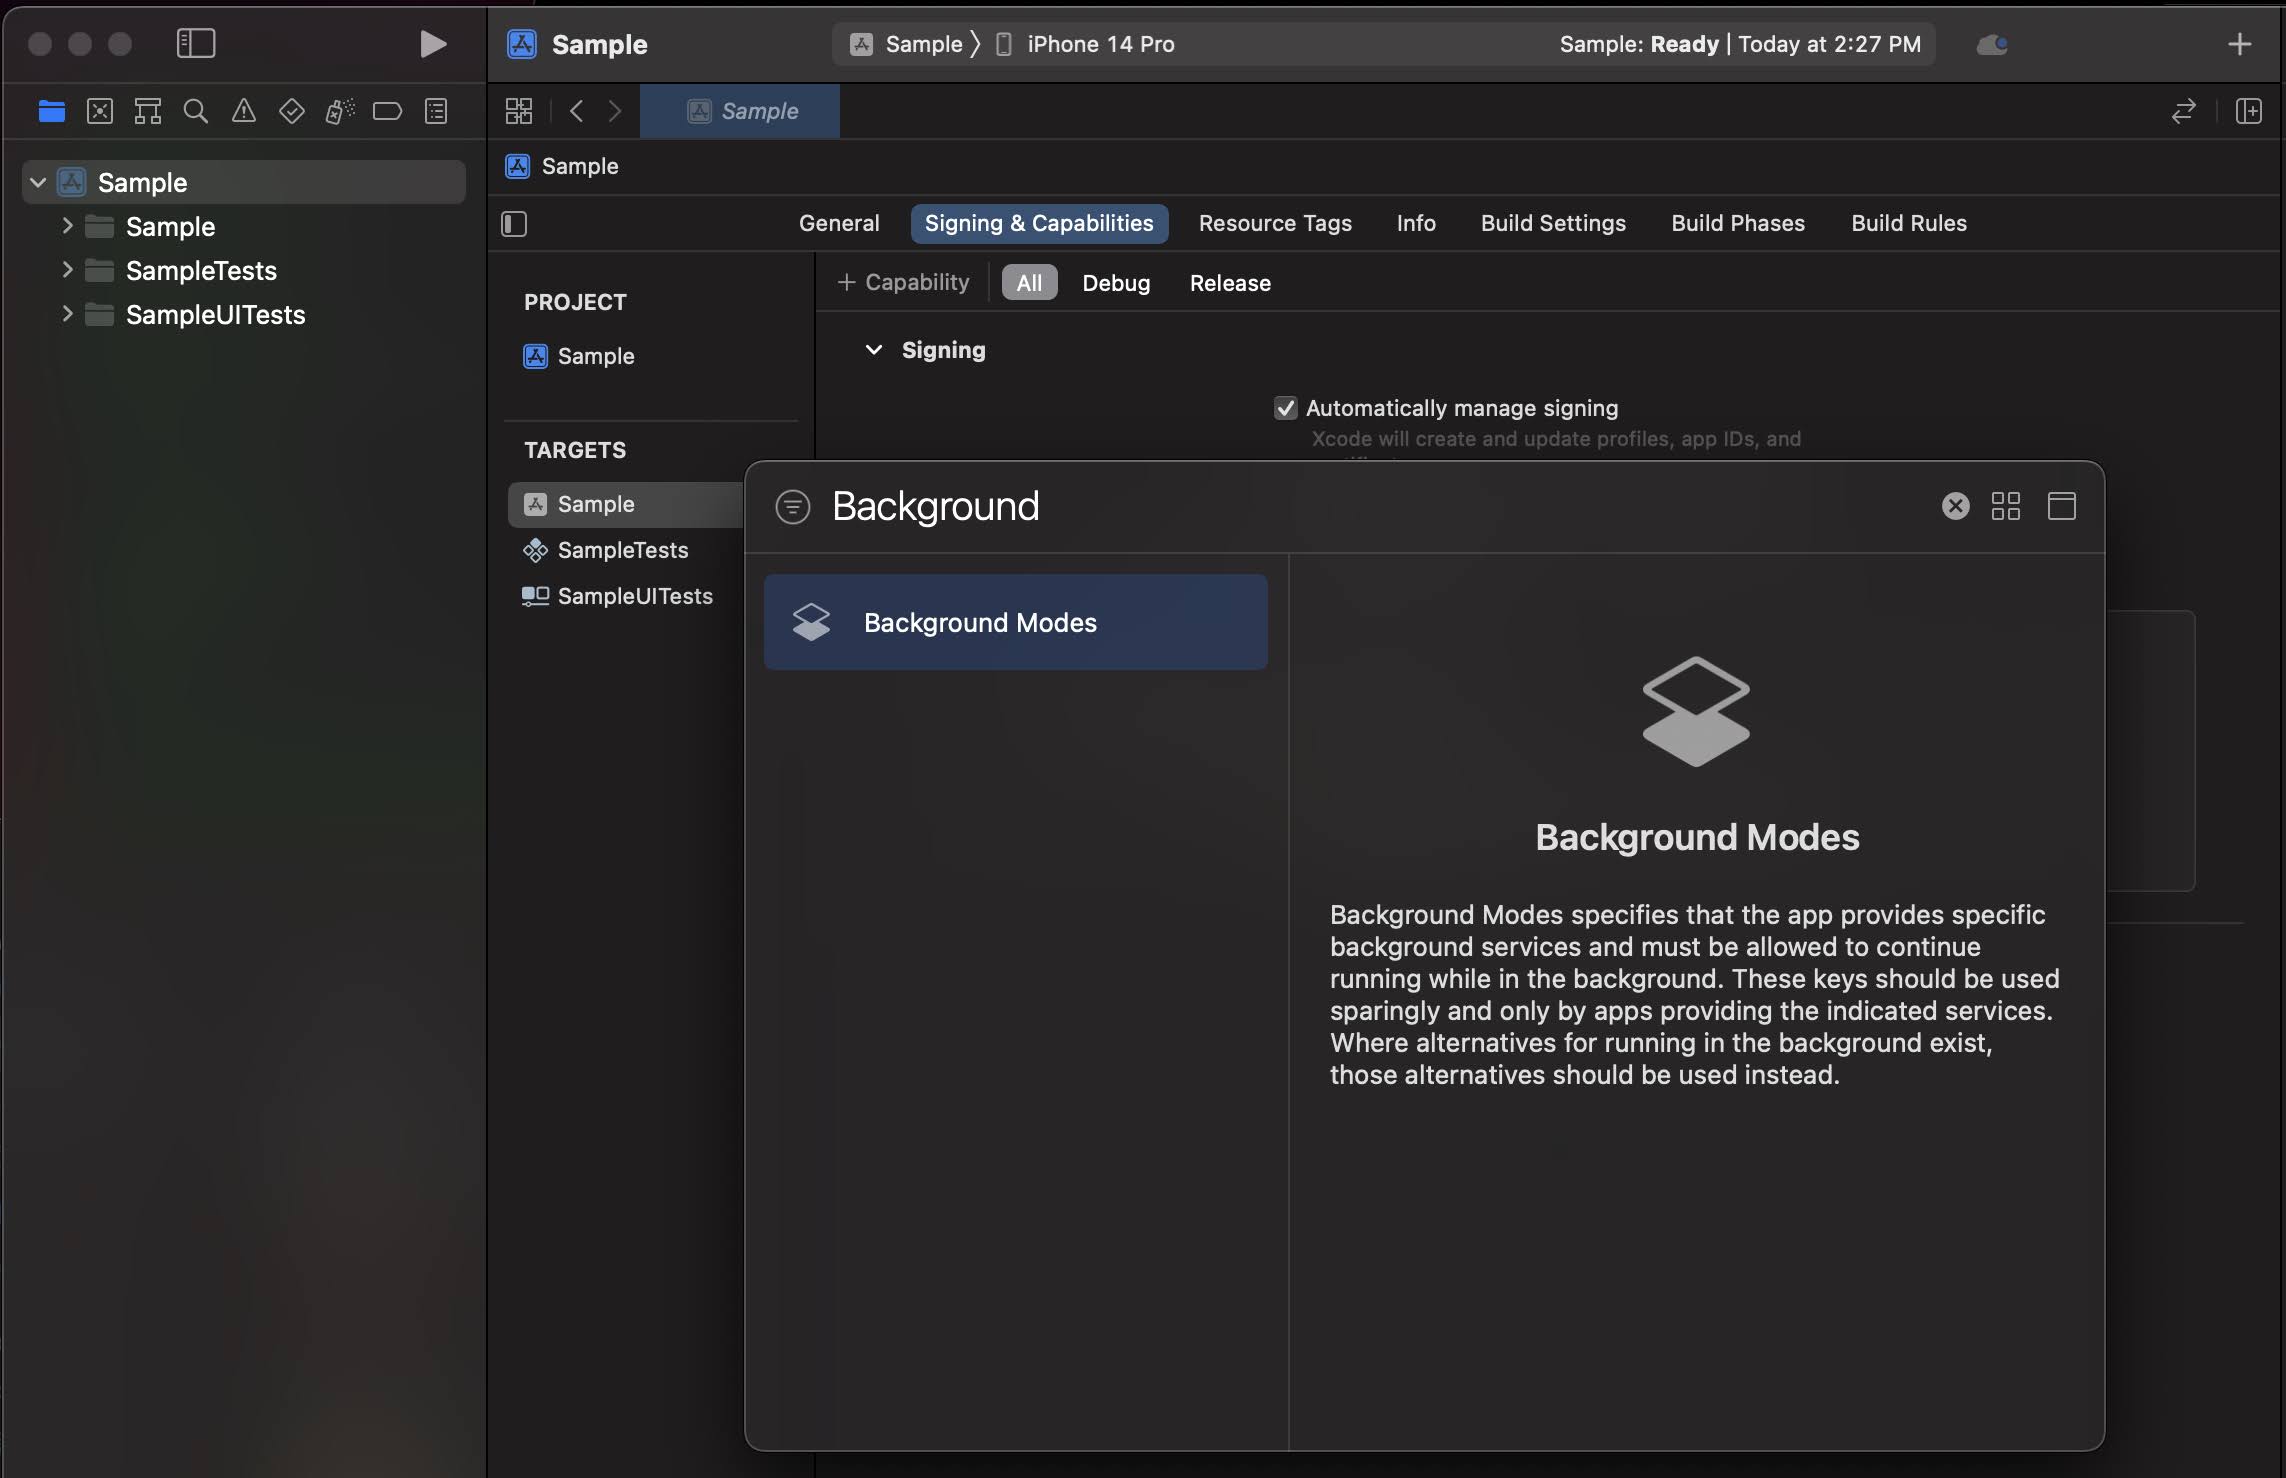
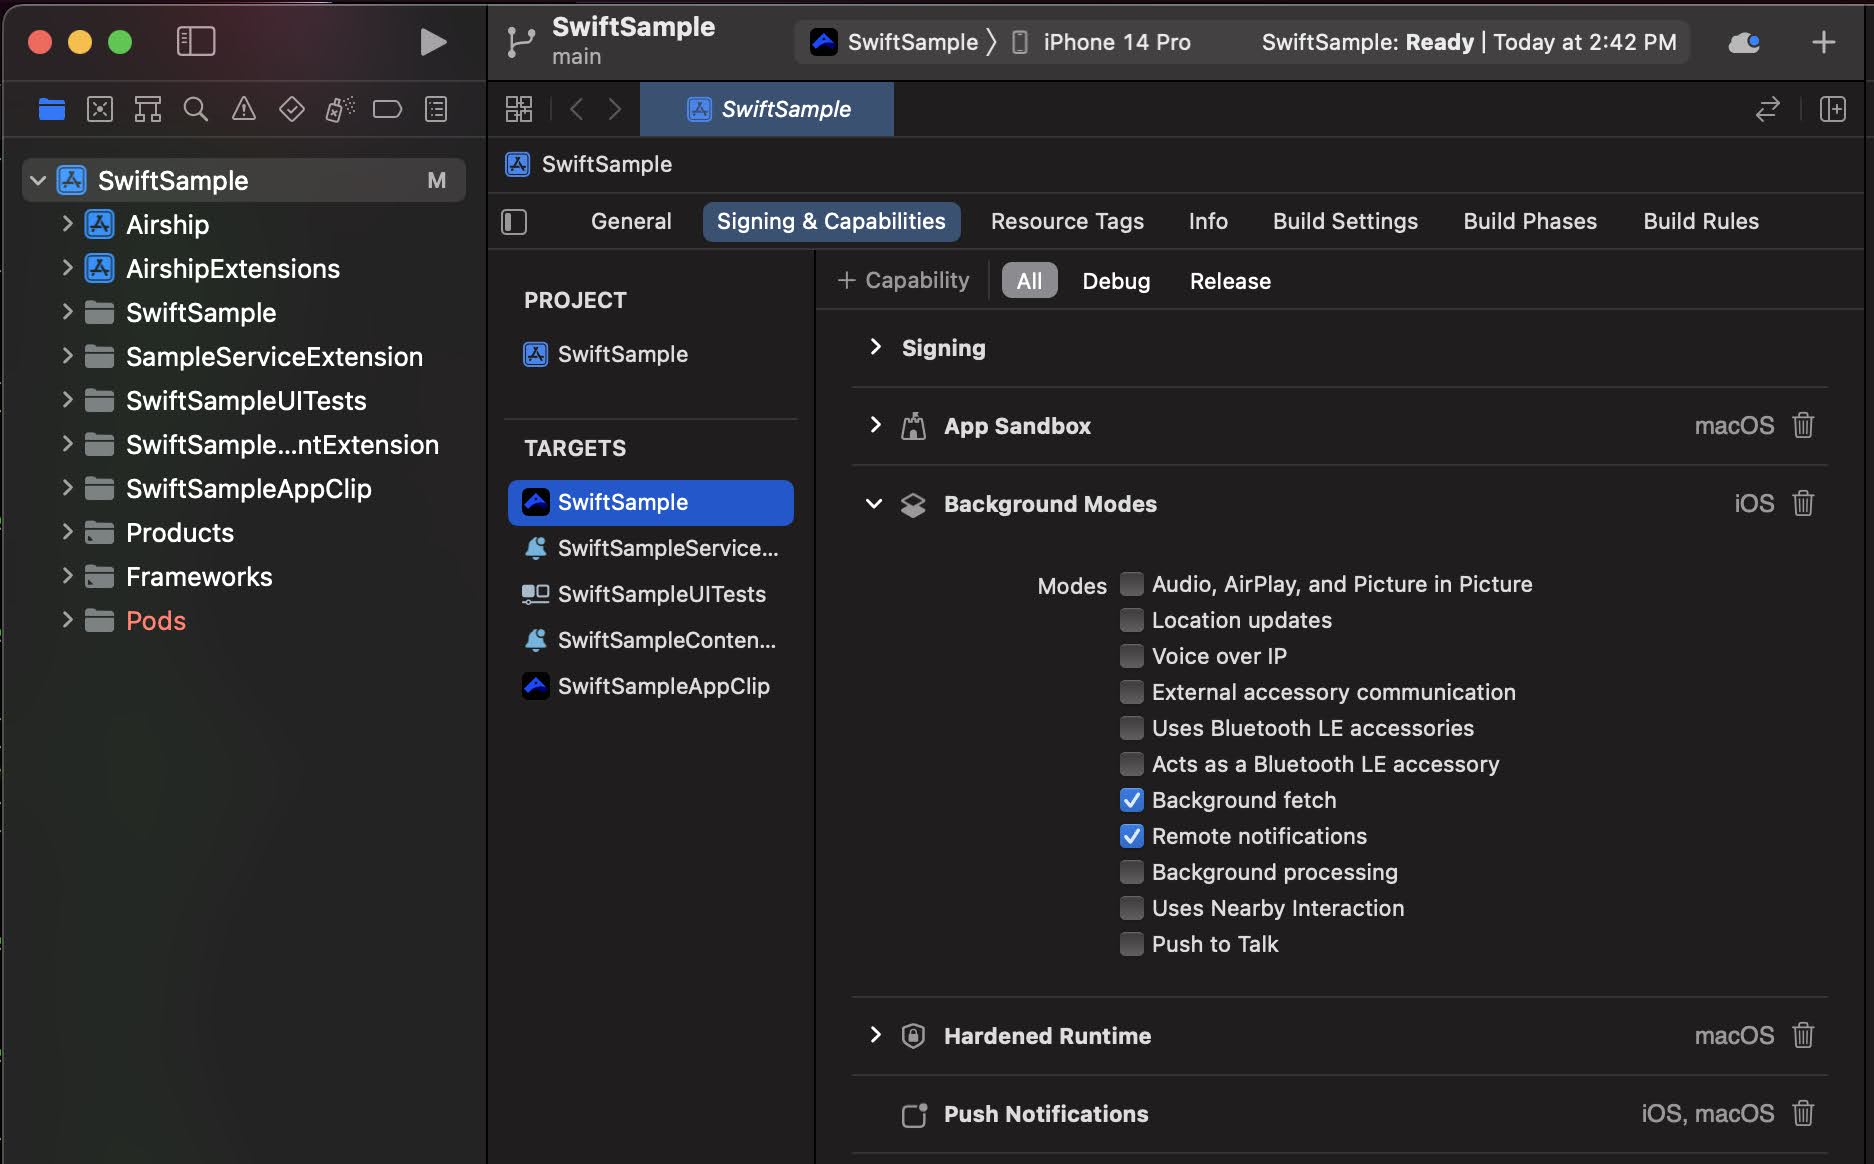
Enable Background Modes
Select your app target and then click the Signing & Capabilities tab.
Click + Capability and add Background Modes.

In the Background Modes section, select the Remote notifications checkbox.

Notification Service Extension
To take advantage of notification attachments, such as images, animated gifs, and video, you will need to create a notification service extension.
Follow the steps in the iOS Notification Service Extension Guide.Android
Configure Firebase Cloud Messaging (FCM) or Huawei Mobile Services (HMS) to enable push notifications on Android.
FCM Setup
If you haven’t already, create a Firebase project and add your Android app in the Firebase Console.
Download the
google-services.jsonconfiguration file from your Firebase project.Place
google-services.jsonin your Flutter project atandroid/app/google-services.json.
Configure Gradle
Add the Google Services plugin to your project-level
build.gradlefile (android/build.gradle):buildscript { dependencies { // Add this line classpath 'com.google.gms:google-services:4.3.15' } }Apply the Google Services plugin in your app-level
build.gradlefile (android/app/build.gradle):apply plugin: 'com.android.application' apply plugin: 'kotlin-android' apply plugin: 'dev.flutter.flutter-gradle-plugin' // Add this line at the bottom apply plugin: 'com.google.gms.google-services'
Notification Configuration
Configure the notification icon and accent color in your takeOff config:
var config = AirshipConfig(
  defaultEnvironment: ConfigEnvironment(
    appKey: "YOUR_APP_KEY",
    appSecret: "YOUR_APP_SECRET"
  ),
  site: Site.us,
  androidConfig: AndroidConfig(
    notificationConfig: AndroidNotificationConfig(
      icon: "ic_notification",
      accentColor: "#00ff00"
    )
  )
);

Airship.takeOff(config);
See the Flutter Setup guide for complete takeOff configuration options.
Enable User Notifications
By default, user notifications are disabled to give you control over when to request permission.
Request notification permission
Enable user notifications to prompt for permission:
// Enable user notifications (prompts for permission)
await Airship.push.setUserNotificationsEnabled(true);
When to request permission
Don’t prompt immediately: Requesting notification permission on app launch typically results in low opt-in rates because users don’t yet understand your app’s value.
Wait for context: Request permission when users understand the benefit. Good times include:
- After completing onboarding
- When a user wants to be notified about specific content
- After a user takes an action that would benefit from notifications
- When explaining the value notifications provide
Example: Contextual permission request
Future<void> requestNotificationPermission(BuildContext context) async {
  // Show a dialog explaining the value of notifications
  bool? shouldEnable = await showDialog<bool>(
    context: context,
    builder: (context) => AlertDialog(
      title: Text('Stay Updated'),
      content: Text(
        'Enable notifications to receive important updates '
        'and special offers directly on your device.',
      ),
      actions: [
        TextButton(
          onPressed: () => Navigator.pop(context, false),
          child: Text('Not Now'),
        ),
        TextButton(
          onPressed: () => Navigator.pop(context, true),
          child: Text('Enable'),
        ),
      ],
    ),
  );

  if (shouldEnable == true) {
    await Airship.push.setUserNotificationsEnabled(true);
  }
}Android 13+ (API 33): On Android 13 and above, enabling user notifications displays a runtime permission prompt. If users deny permission, they must manually enable notifications in system settings.
To maximize opt-in rates, avoid prompting immediately on app startup and instead wait for an appropriate moment when users understand the value of notifications.
Check Notification Status
Check if notifications are currently enabled on Airship:
bool enabled = await Airship.push.isUserNotificationsEnabled;
print('User notifications enabled: $enabled');
For a detailed breakdown of notification status:
PushNotificationStatus? status = await Airship.push.notificationStatus;

print('User notifications enabled: ${status?.isUserNotificationsEnabled}');
print('System notifications allowed: ${status?.areNotificationsAllowed}');
print('Push privacy feature enabled: ${status?.isPushPrivacyFeatureEnabled}');
print('Push token registered: ${status?.isPushTokenRegistered}');
print('Fully opted in: ${status?.isOptedIn}');
The notification status provides:
isUserNotificationsEnabled: If user notifications are enabled on AirshipareNotificationsAllowed: If notifications are allowed at the system levelisPushPrivacyFeatureEnabled: If the push feature is enabled on Privacy ManagerisPushTokenRegistered: If push registration was able to generate a tokenisOptedIn: If Airship is able to send and display push notifications (requires all of the above)
See the Troubleshooting guide for help diagnosing notification issues.
Get Push Token
For debugging or integration purposes, you can access the device’s push token:
// Get the push token (FCM registration token on Android, APNs device token on iOS)
String? pushToken = await Airship.push.registrationToken;
print('Push token: $pushToken');
Listen for token changes:
Airship.push.onPushTokenReceived.listen((event) {
  print('Push token received: ${event.pushToken}');
});
Next Steps
- Handling Notification Events — Listen for push received and notification response events
- Customizing Notifications — Configure iOS notification options, badges, and foreground presentation